
About my Shopping Guides

All the projects on this website and future projects use the same set of electronics and I recommend using exactly the same parts to recreate my projects. Not every motor, LED or transistor will work with button cells and there is a lot of crappy conductive tape out there!
That’s why a shopping guide is included in every download.
Contents of my shopping guides
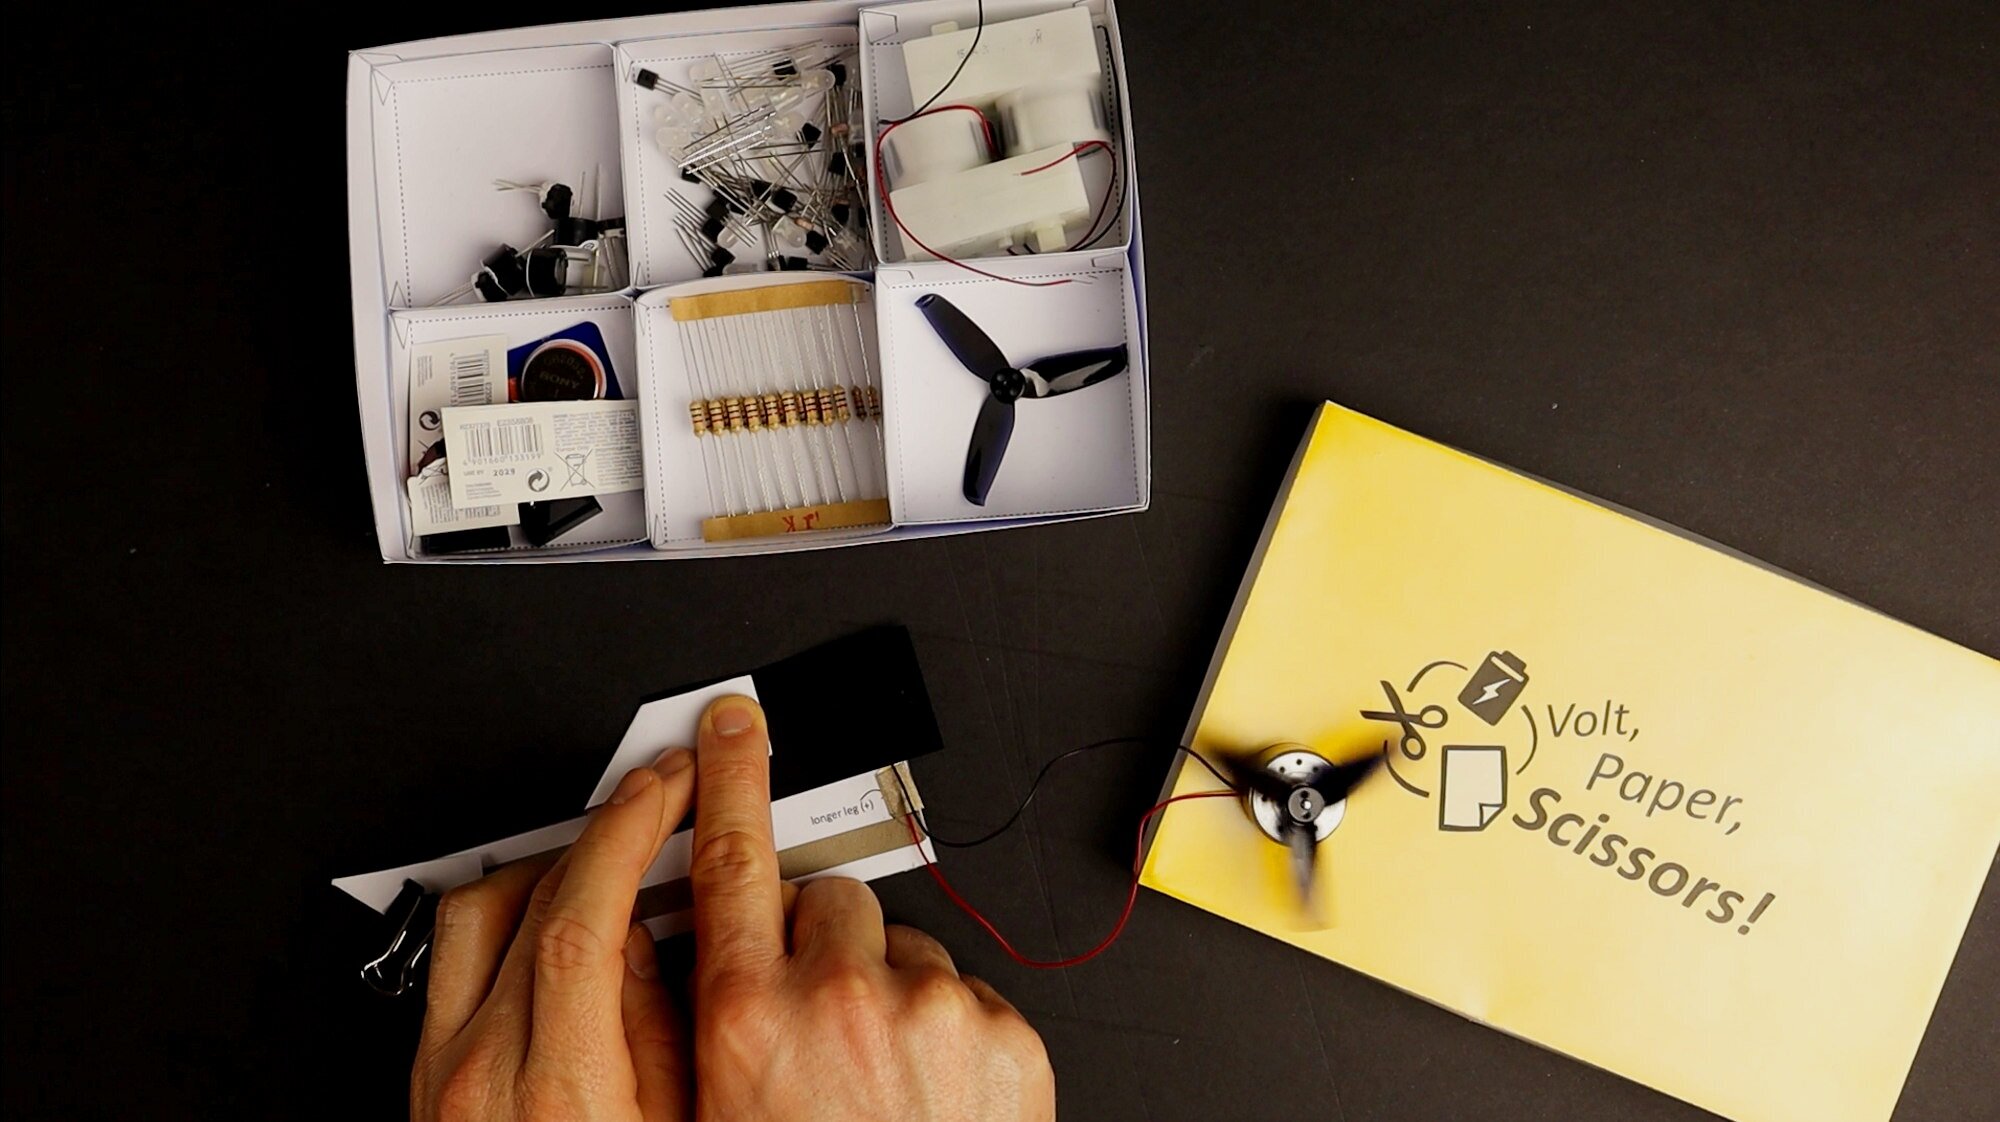
Have a look at this preview page (with deactivated links). All shopping guides include:
A shopping list for the project it is included in
Multiple shopping links for every component I use
Detailed descriptions in case you want to search the web yourself
What links are included?
For the shopping guide, I decided to use DigiKey because you will get almost all electronics there in any quantity you like and they ship globally. This definitely is the most convenient solution! Alternatively, there are Adafruit links for most components. For some materials, Amazon is also an option.
All Components Explained

Conductive Tape
Conductive tape enables you to create everything without the need for special tools or a dedicated makerspace. It's just the perfect fit for paper circuits. It is cheap and easy to use, which makes it ideal for teaching kids about electronics. And, it is save to use. Resulting circuits are very visual, which increases comprehensibility and learning. This makes it superior to the use of breadboards.
But it is important to get good conductive tape which has conductive adhesive. Without conductive adhesive, you can not stick one strip on top of another strip and still have a working circuit. That is something kids intuitively expect when, for example, making a simple corner in the circuit.
There are two types: Copper tape and conductive nylon fabric tape. In most cases, I recommend the conductive nylon fabric tape because it makes better and longer-lasting connections. In case you want to solder components to the conductive tape, you have to use copper tape instead. I use Conductive Nylon Fabric Tape, 8mm wide x 10 meters long.
Minimum required amount: 1 roll (10 meters)
LEDs
Kids love the moment when they first light up an LED (light-emitting diode). LED’s are very easy to use. I use only white LEDs because they are perfect for the three-volt button cell, and you can easily use colored paper to turn a white LED into colored light.
I prefer diffused LEDs over clear ones because of the even distribution of light.
Other LEDs are fine too, but often LEDs are not designed to emit much light. The LEDs I use are a very bright WARM WHITE LEDs of 5mm size.
Minimum required amount: 10 LEDs


RGB LED
RGB LEDs are basically three different colored LEDs in one. By mixing the brightness of the three colors, you can create any color you like. RGB LEDs are great for the first interactive circuits. There are two types: Common anode and common cathode. I use common cathode RGB LEDs that have a diffused lens (body).
Minimum required amount: 4 RGB LEDs
Buzzer
Buzzers make noise, which is a lot of fun for kids. It's a great way to make alarm circuits or interactive games. It is important to find an internally driven buzzer (also called beeper) that beeps if connected to a circuit. External driven speakers have to be driven by a PWM signal. You should have a look at the voltage needed. It should be in the range of three to six volts (one or two button cells). I use a internally driven audio magnatic indicator 3-7 Volt.
Minimum required amount: 1

Geared Solar Motor
These are my absolute favorite tinkering material, and I have a lot of amazing projects planned that use these motors. You can power them with little solar cells or little button cells. Since they have a gear that lets you choose the transmission, you can do anything with them! From a fast spinning propeller to a car and a very strong robot arm.

I use the Solarbotics GM17 228:1 (available in US and other countries)
Important: This motor has a fixed transmission of 228:1. If you use this motor, try to get the conversion gears for each motor to be able to change the transmissions. The mounting brackets for the motor are also great.
Minimum required amount: 2
Alternative for Germany, EU, and other countries:
Sol-Expert Universal transmission kit G243 with motor. This is also an absolutly great motor set. You can use this motor with or without the gear. The gear has four optional transmissions: 9:1/27:1/81:1/243:1.
Minimum required amount: 2

Propeller
Propellers are fun. You can make boats and other stuff with it. So your motor needs one! For our motor, we need a propeller with 2mm center hole to fit on the motor shaft. Any propeller diameter between 5-9cm should be fine. I can recommend the GEMFAN 3018 or 3016, which are widely available. If you have a 2mm drill, you can use propellers with smaller center holes and drill a 2mm hole (e.g. GEMFAN 2540).
Minimum required amount: 2
Button Cell (CR2032)
Button cells are perfect for paper circuits because they are cheap, small, lightweight, and low on energy. So if something goes wrong (e.g. a short circuit) nothing is happening, except the battery becoming slightly warm. You can find more about safety for paper circuits on my basics page.
Another advantage is, I never had a LED destroyed by a button cell, even when I did not use a resistor in the circuit. I use the CR2032 button cell which is widely available.
Minimum required amount: 4 batteries (more is better, so you can exchange low batteries)


Solar Cell
The future’s energy is sustainable. So teaching kids about it is a must for me. I put a lot of effort into making every project being powered by solar energy as an alternative to batteries. Solar cells can be a little costly in large quantities, so keep in mind that you can always use button cells instead.
The solar cells I use generate up to 500 milliWatt and 8.2Volts.
Minimum required amount: 1 (2 is best)
Transistor
Some people put the transistor in the same league of human inventions as fire and the wheel, because the digital devices we now own have millions of them inside. As fire and wheels are fun to play with, so is the transistor. Transistors give you the ability to control other components like motors, LEDs, and buzzers. It even lets you control the amount of power you apply to those other components.
I use very basic NPN transistors (TO-92) that are cheap in large quantities.
Minimum required amount: 4

Resistor
Resistors are handy in many cases. They reduce the flow of current in specific parts of your circuit. Resistors come in many different values (of resistance). The ones I chose to use are: 100 Ohm, 1 kOhm, 10 kOhm
Minimum required amount: 10 of each value
Since resistors are very cheap, you can also get more different values. However, I chose to have only the above three because you can easily use two resistors in series to add their values or two resistors in parallel to get half of the value. Doing this is a nice learning for kids.
Potentiometer
Potentiometers are great! They make projects much more interactive by adding a variable resistance to your circuit. That way, you can control the speed of motors, the brightness of LEDs, or the loudness of a buzzer by turning the knob of the potentiometer.
I found that a very low 200 Ohm Potentiometer works best with my components.
Minimum required amount: 2


Photoresistor
These “light sensors” are variable resistors that change their value from very low in bright light to very high in darkness. So it detects light. Use them to bring some real magic to your circuits. And by the way, they are really cheap! I use photoresistors from 16 to 33kOhm.
Minimum required amount: 2
Velostat
This black foil is another variable resistor. In this case, the resistance changes when pressure is applied. It has a very high resistance in normal conditions. When pressed, it changes its resistance. The more you press, the lesser the resistance. Velostat is also called pressure-sensitive conducitve sheet. Velostat is often used as packaging for electronic components, which makes it another very cheap material.
Minimum required amount: one sheet is more than enough!


Wire
Besides conductive tape, wire comes in handy if you need to connect things that are far apart. Like a remote-controlled robot through cables. I use super flexible wire of less than 1mm diameter in red and black.
Minimum required amount: 2 red wires, 2 black wires (1 wire = 2 meters)
Binder Clips
Binder Clips are the cheapest way to connect your button cells to the conductive tape and still have the opportunity to remove them after use. I use a foldback binder clip of 19mm size, which is perfect for up to two CR2032 button cells.
Minimum Amount: 4 clips


Magnets
Magnets are an awesome way to open and close circuits by creating DIY switches and much more! I often use them as “temporary glue” to make things stick together, and I have big plans for the use of magnets. I recommend neodym magnets of about 1cm diameter and 2mm thickness.
Minimum required amount: 25 magnets
Tools: Scissors, Glue etc.
Besides the electronics, you will only need scissors and paper glue. Some other glue, like hot glue or all-round glue, will be helpful. You will also need a ruler from time to time. A cutter knife is optional.
Tinkering Materials: Sticks, straws etc.
For tinkering with paper, I often use cardboard, toothpicks, wooden skewers, straws, and other stuff that you will find in any supermarket.

Paper
To me, paper is the ultimate tinkering material, because everyone has it and has the tools to work with it, yet there are hardly any limits to paper engineering. Great about paper is, that you can easily cut it, fold it, glue it, color it, and print stuff on it! What other material is that versatile? You can make paper-circuits, paper-art, paper-mechanics and recreate 3D computer models with it! Combine it with old cardboard, for more stability and possibilities are endless!
The most versatile paper thickness is 160g printing paper. It is easy to fold and much more robust than the normal 80g printing paper. Thicker paper like 200g or 250g is great too. The only exception is if you want to have the light of a LED to shine through. But vegetable oil makes any paper, even thick colored paper, much more translucent!