
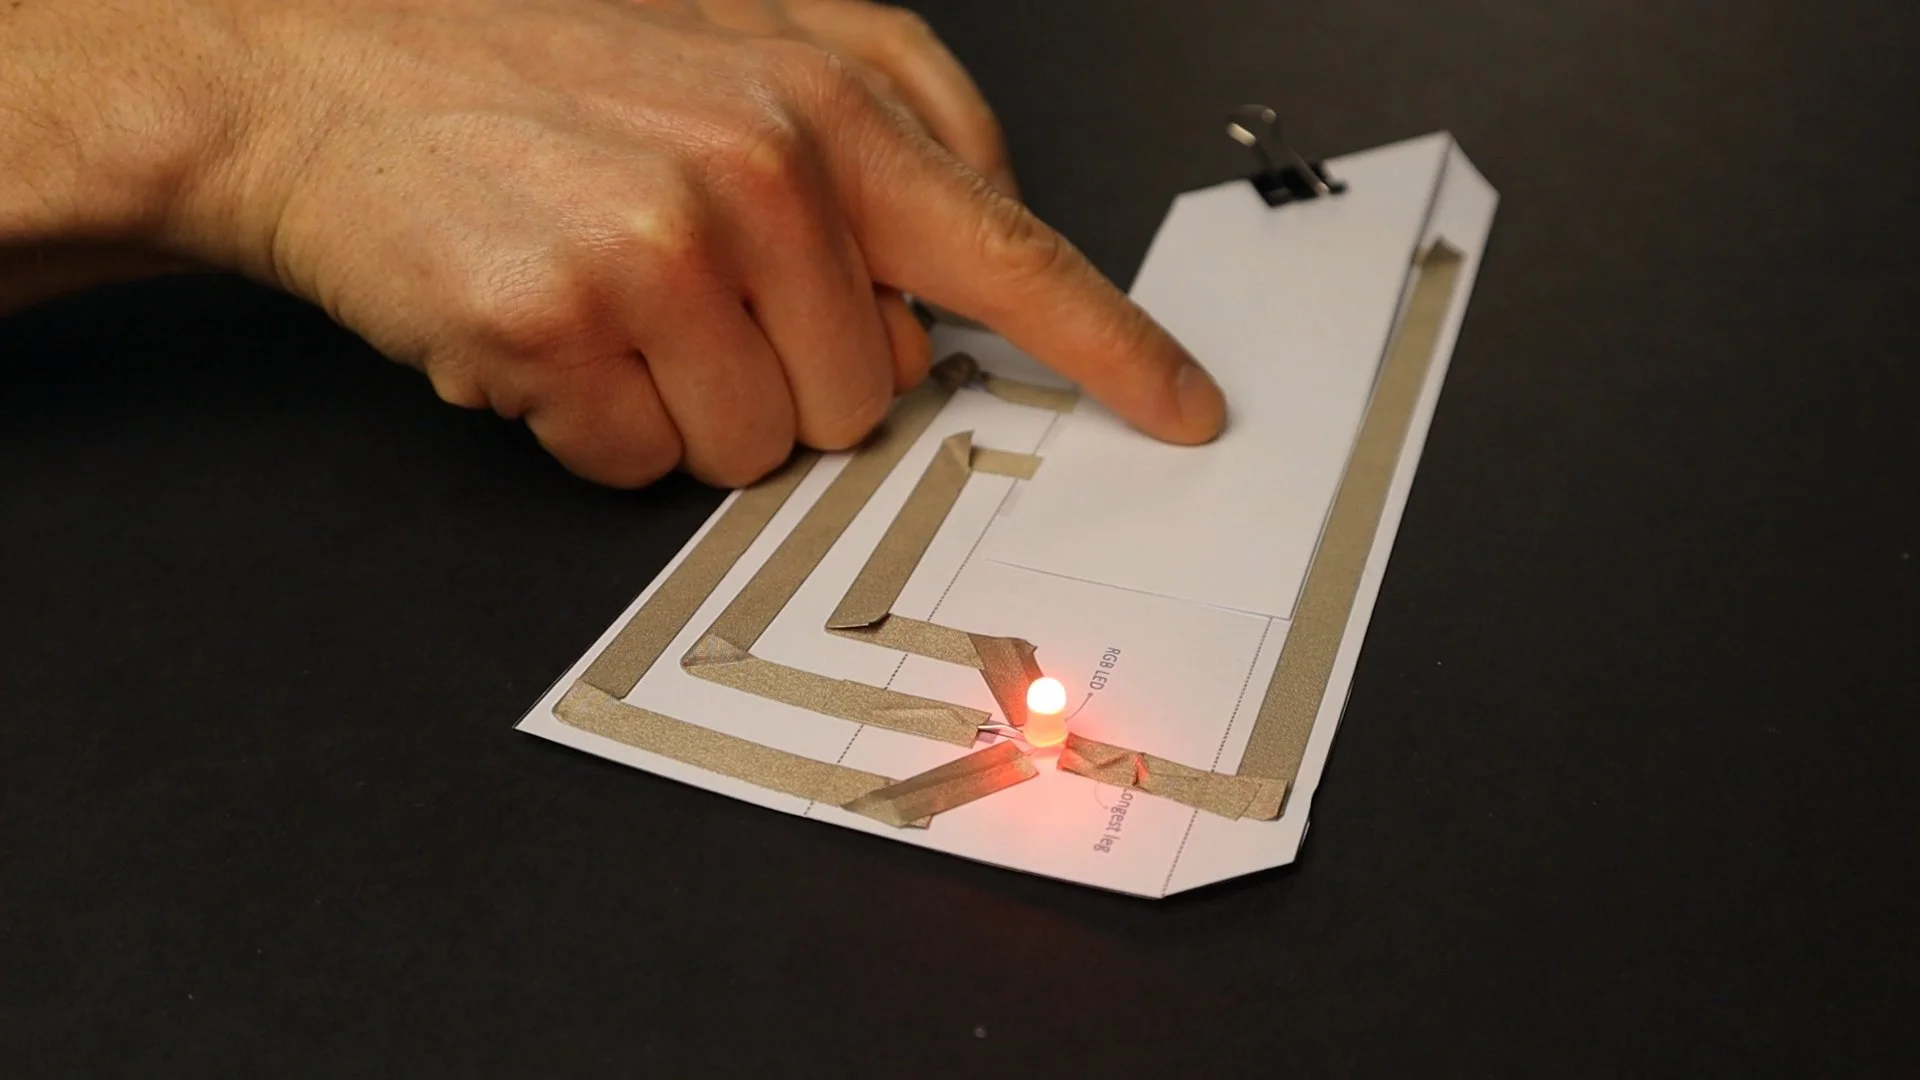
What are Paper Circuits?
Paper circuits blend basic electronics with traditional paper crafting to make engineering highly creative and accessible. By replacing messy wires with simple conductive tape, paper circuits allow beginners to build anything from a light-up greeting card to a smart, controllable robot. Best of all, no special tools are required!
Check out my video below to see my favorite projects in action!
Most online guides stop at flat illustrations with a single LED stuck on top, but I love pushing this medium much further. My goal is to find unique, unexpected ways to fuse art with engineering—creating playful, interactive toys, light-up gadgets, and smart robots that actually work, moving far beyond basic decoration.
The Easy Circuit: A Quickstart to Paper Circuits
Here is a simple template to help you try your very first paper circuit, along with a few hands-on experiments to get you started.
To build this, you will need:
Conductive tape
A button cell battery
A standard LED
A binder clip
My Easy Circuit Template (download below)
Note: Other components are entirely optional but recommended.
If you prefer not to sign up on TpT, subscribe to my newsletter to download the Easy Circuit template and required shopping list for free.
Step-by-Step Paper Circuit Tutorial
Note: Watch my video above for visual instructions.
Preparation
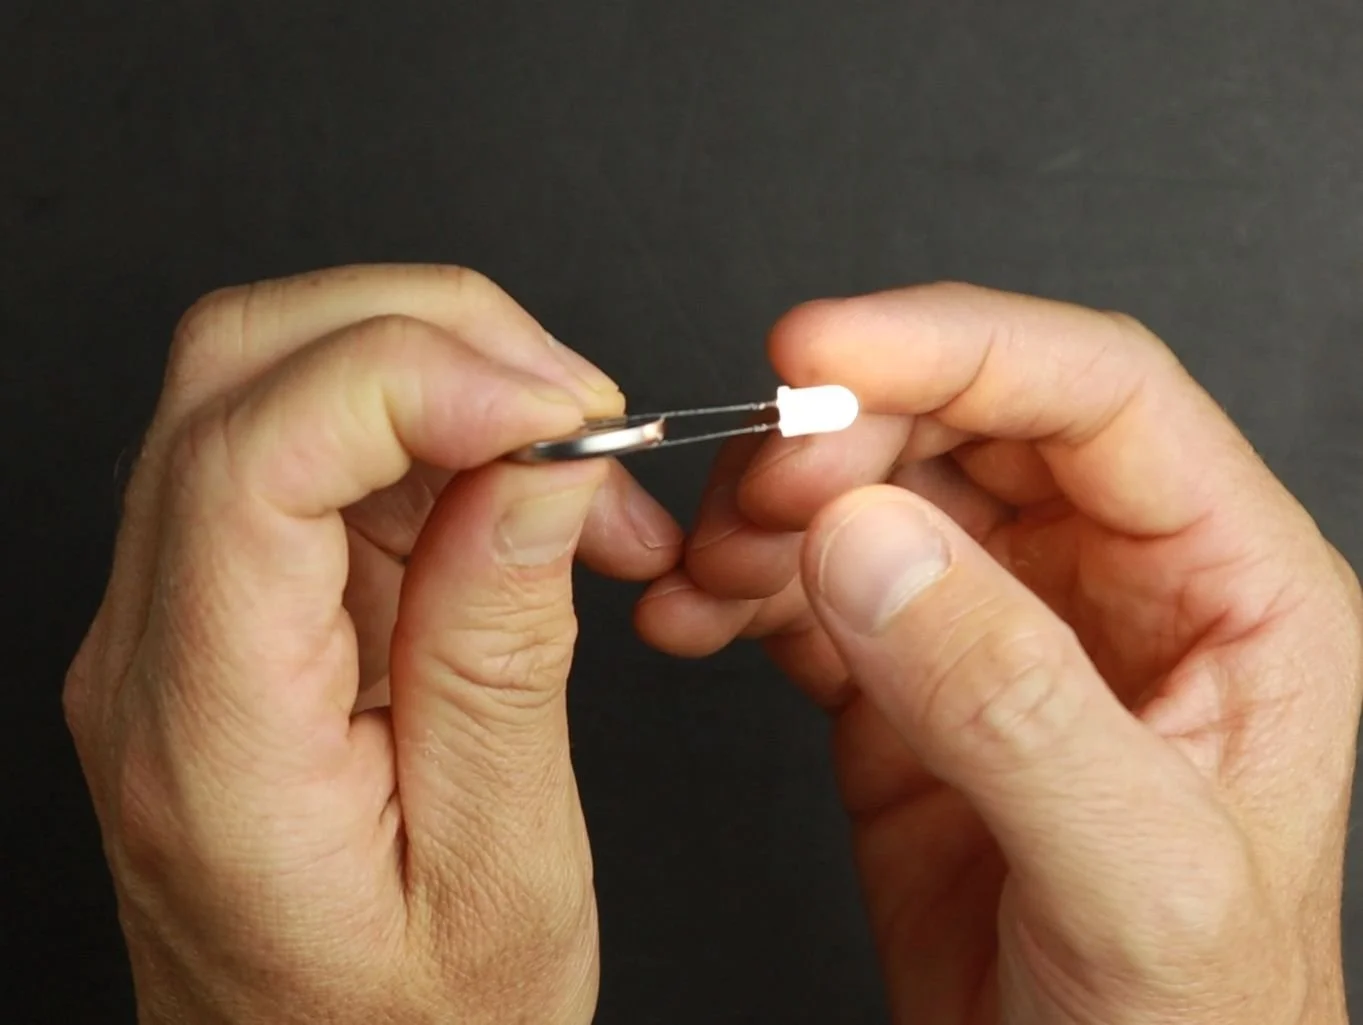
Test your LED by sliding the legs directly over the sides of the button cell.
Hint: The longer leg of the LED must point to the positive (+) terminal of the battery.
Step 1: Trace the Tracks
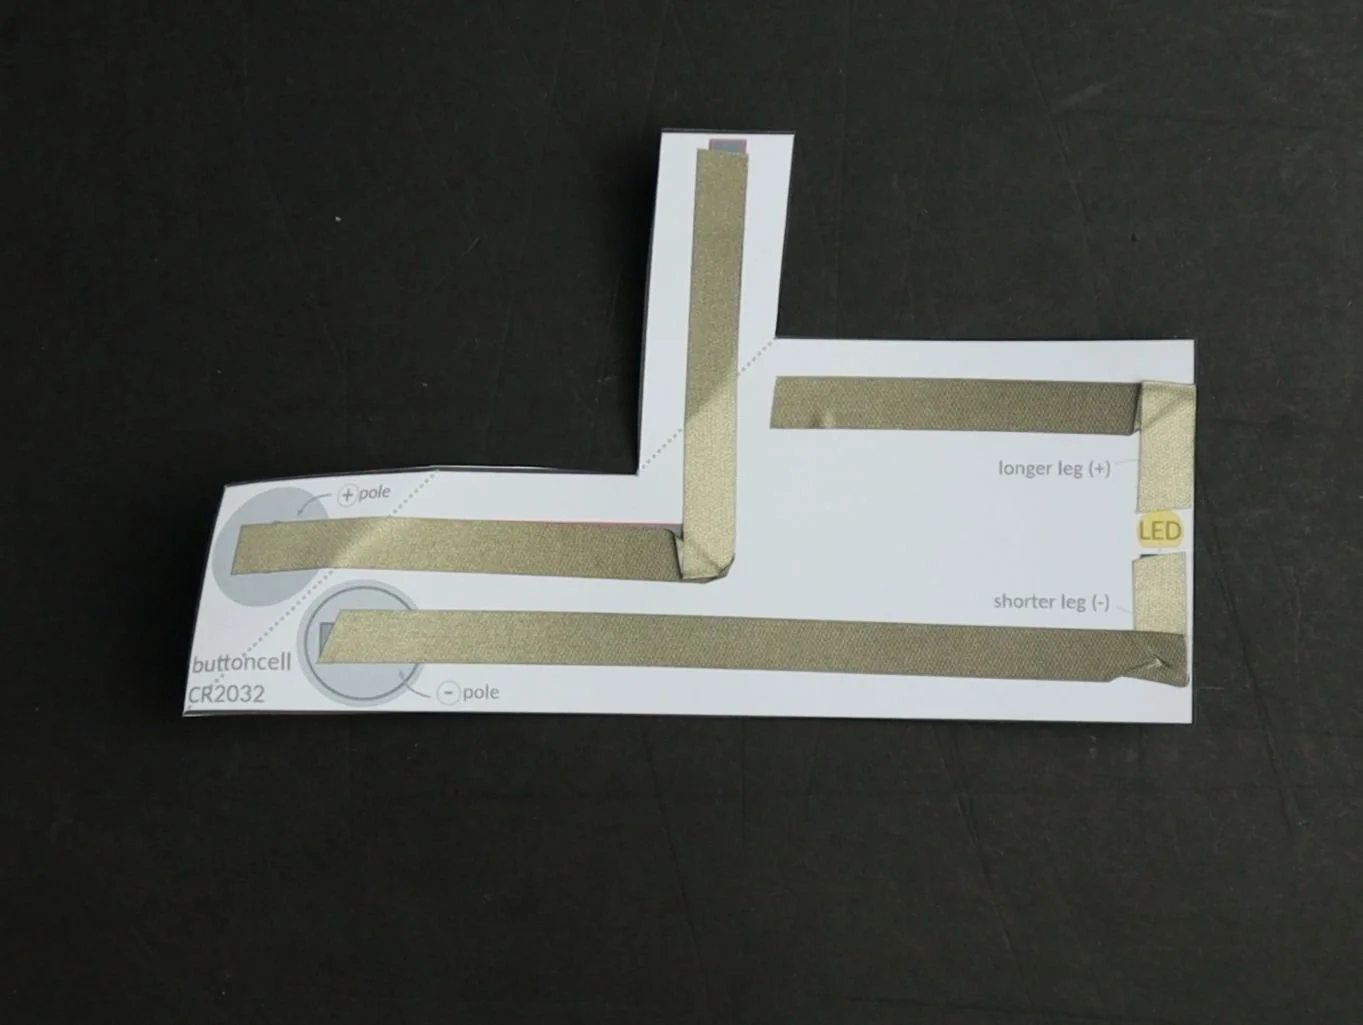
Trace the printed circuit tracks on your template using conductive tape.
Important: Leave a small gap right where the LED will be attached. This forces the electrical current to flow through the LED instead of bypassing it.
Step 2: Attach the LED
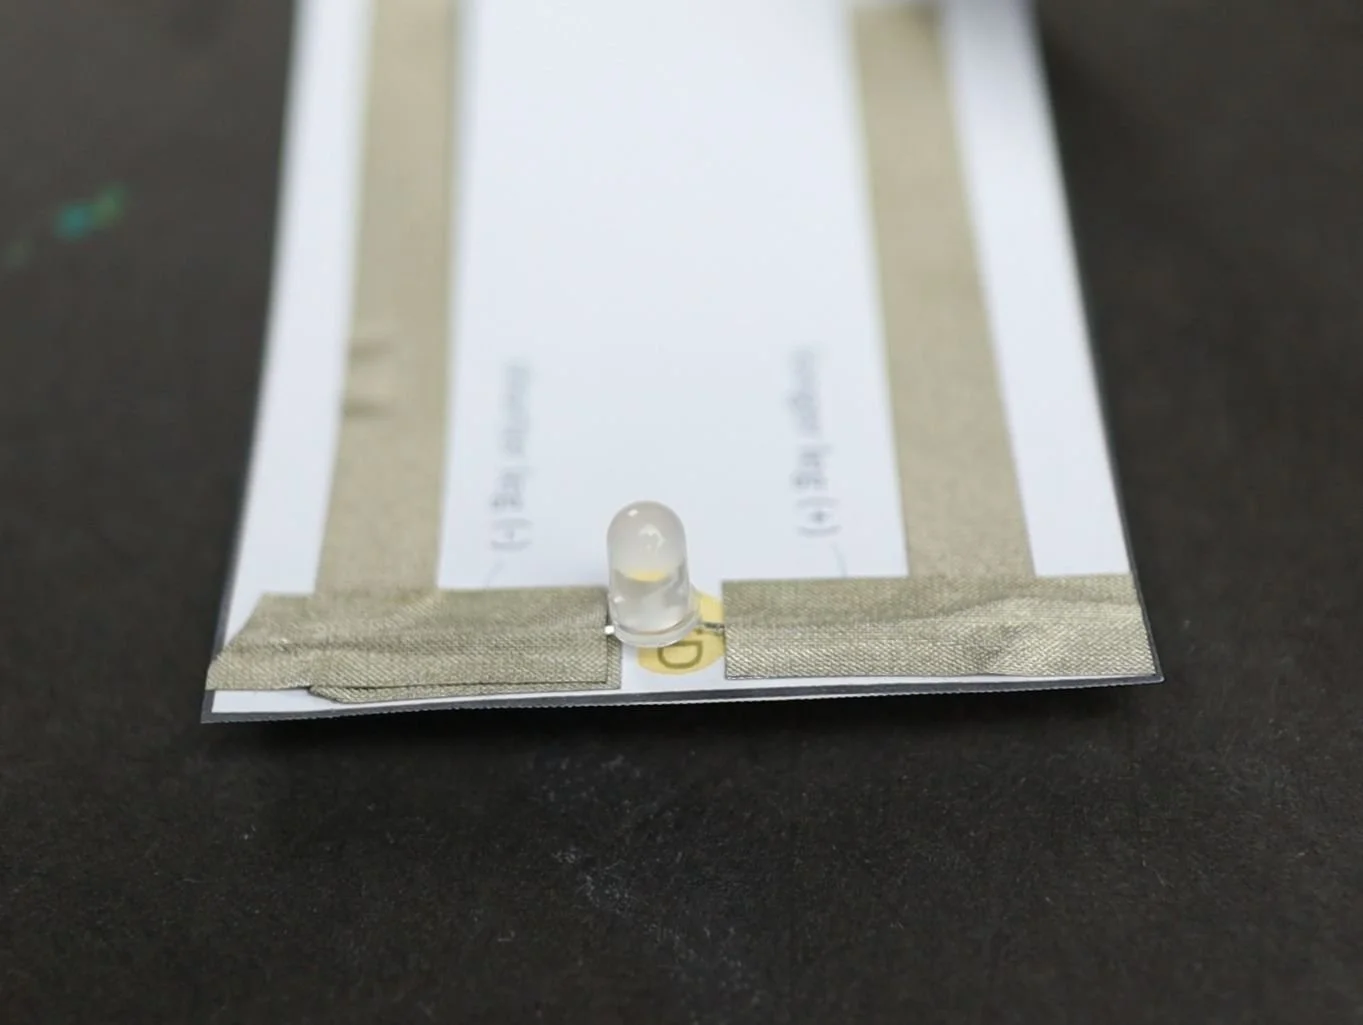
Secure the LED legs down onto the circuit tracks using short strips of conductive tape. The template indicates where to put the longer leg.
Important: The LED legs must be attached on top of the conductive tape tracks you laid down in Step 1 to ensure a solid connection.

Step 3: Secure the Battery
Fold the flap over the battery and clamp it in place using a binder clip.
Important: The negative (-) terminal of the battery must face downward.
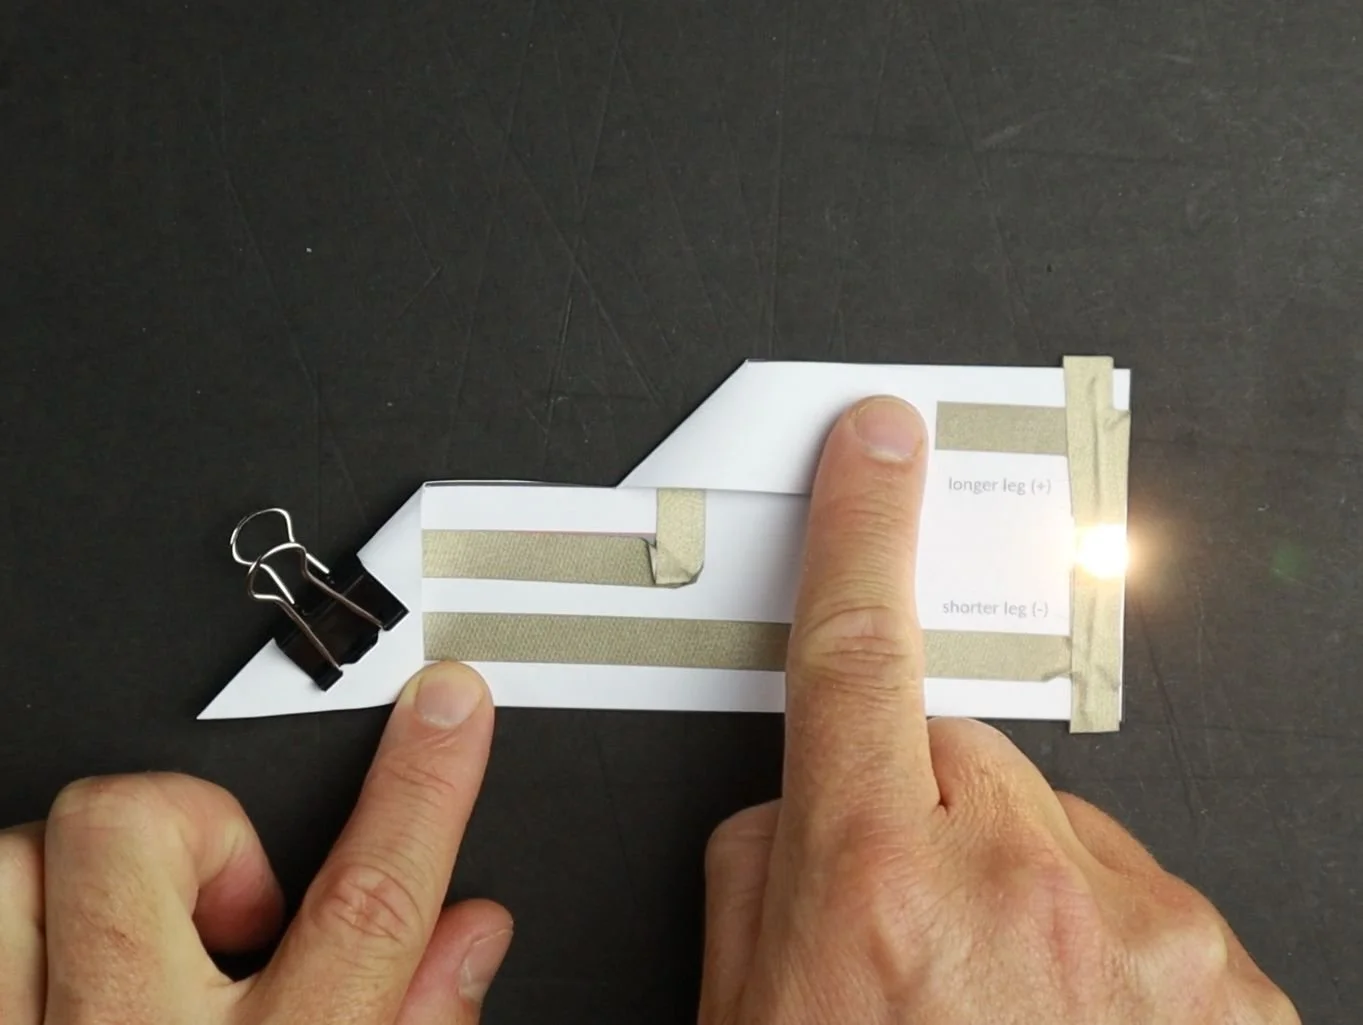
Step 4: Test the Switch
Fold your DIY switch over to complete the circuit and watch your LED light up!
Troubleshooting Your Paper Circuit
If your LED does not light up:
Try flipping the battery (or the LED) around to reverse the polarity.
Double-check that there is a distinct gap in the circuit directly underneath the LED.
Check for a short circuit right at the button cell (ensure the conductive tape isn't bridging across the battery's insulating black ring).
If your LED stays on constantly:
Make sure there is a gap in the circuit where the on/off switch folds over.
Easy Circuit Experiments to Try Next
Once your circuit is working, you can try some hands-on experiments:
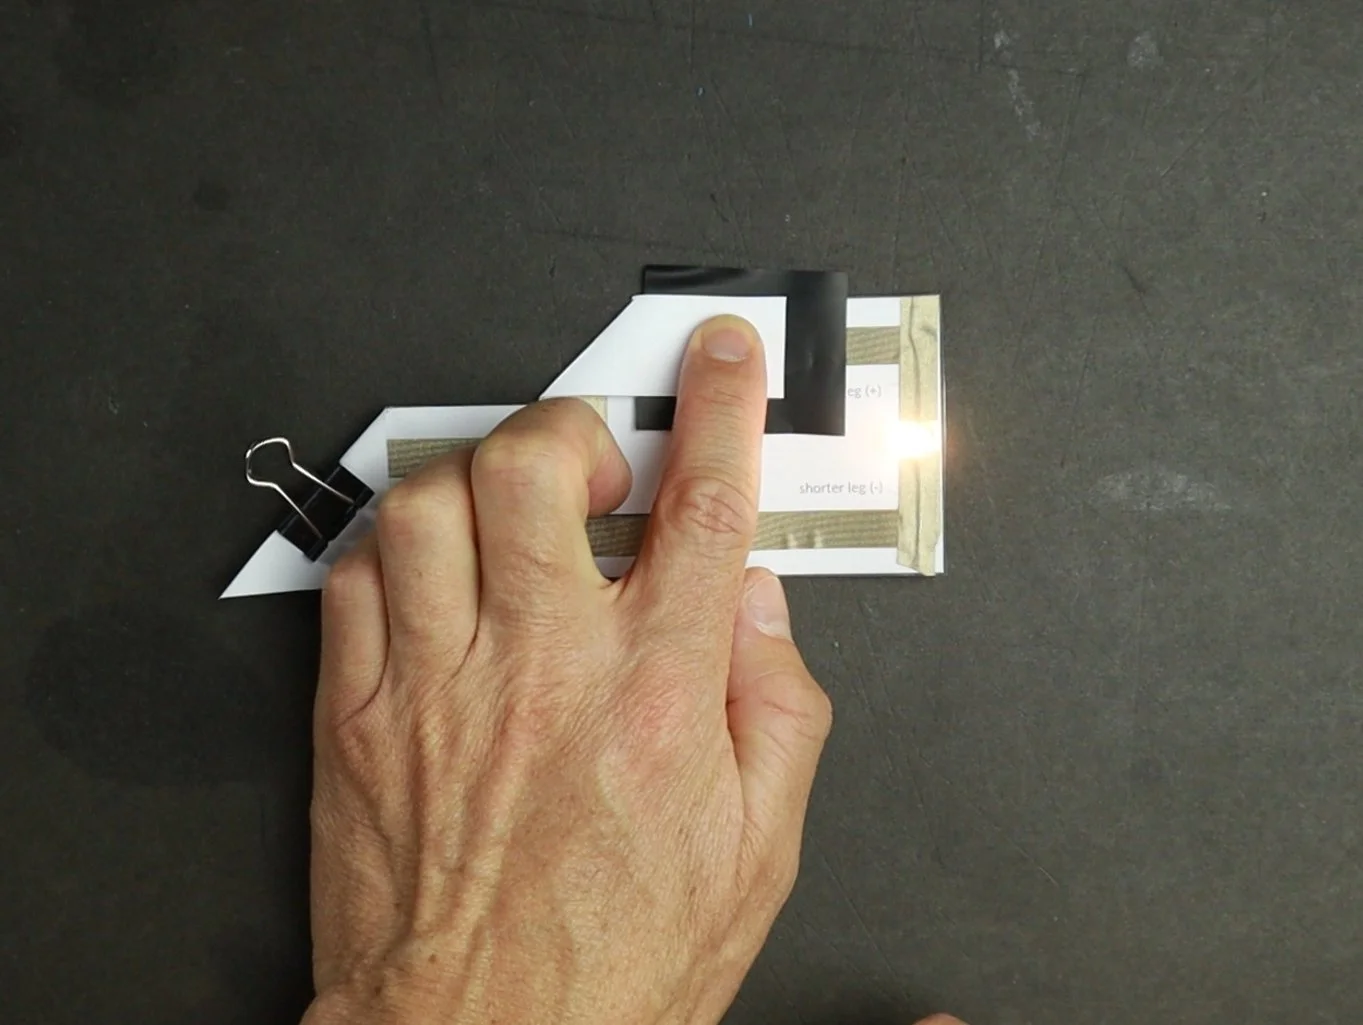
Make a Pressure Sensor
Use Velostat between the fold-over switch to create a pressure-sensitive switch.
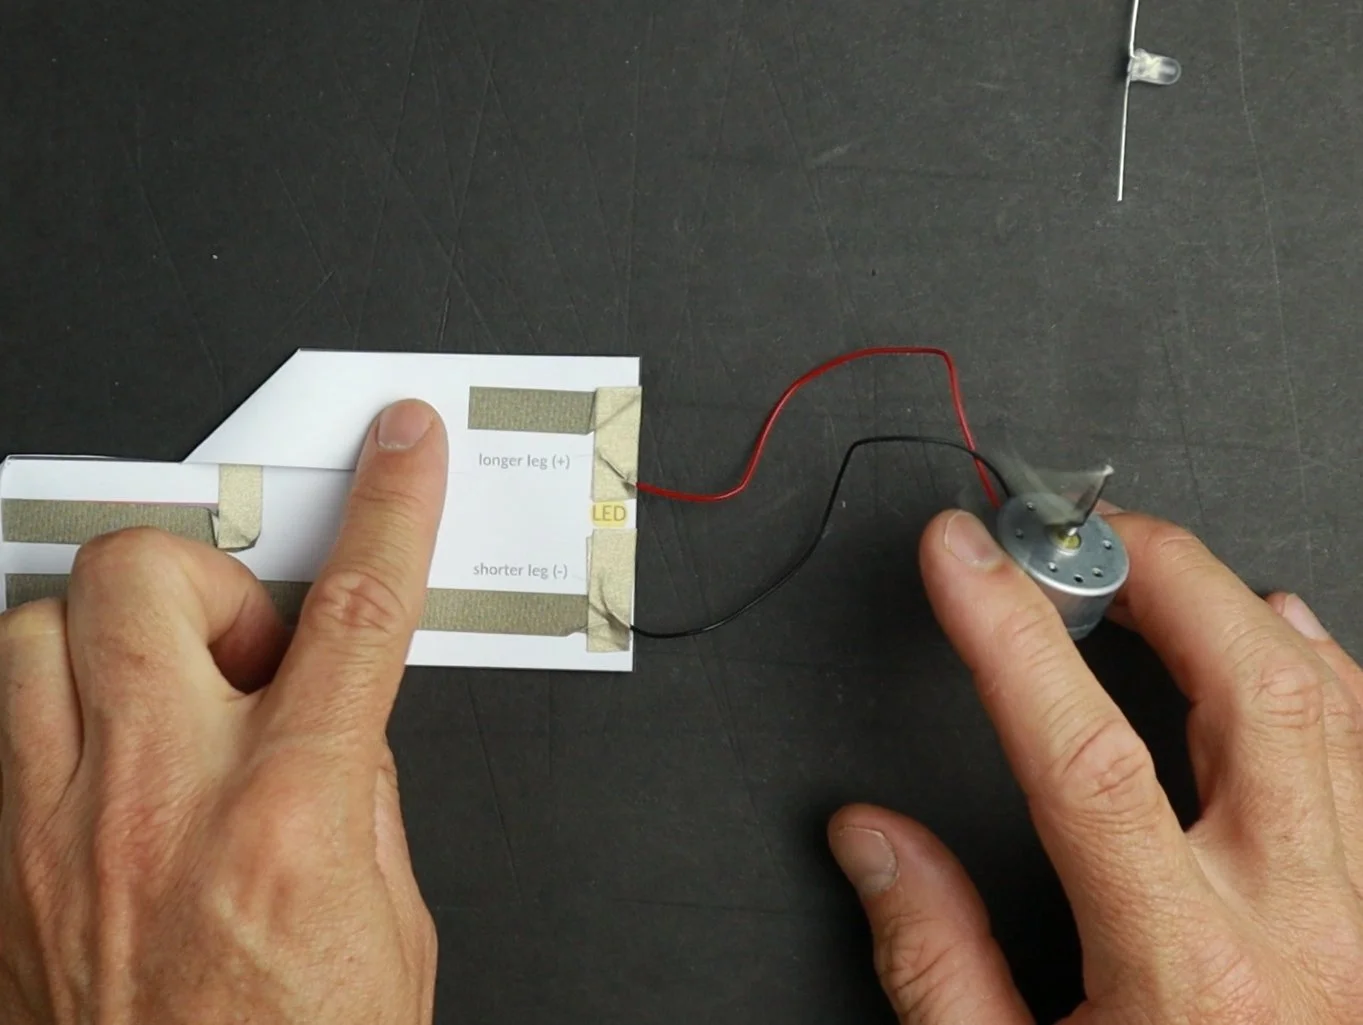
Connect a Motor
Replace the LED with a solar motor to test a different component.
Note: To power motors, you can use a stack of two button cells instead of one.
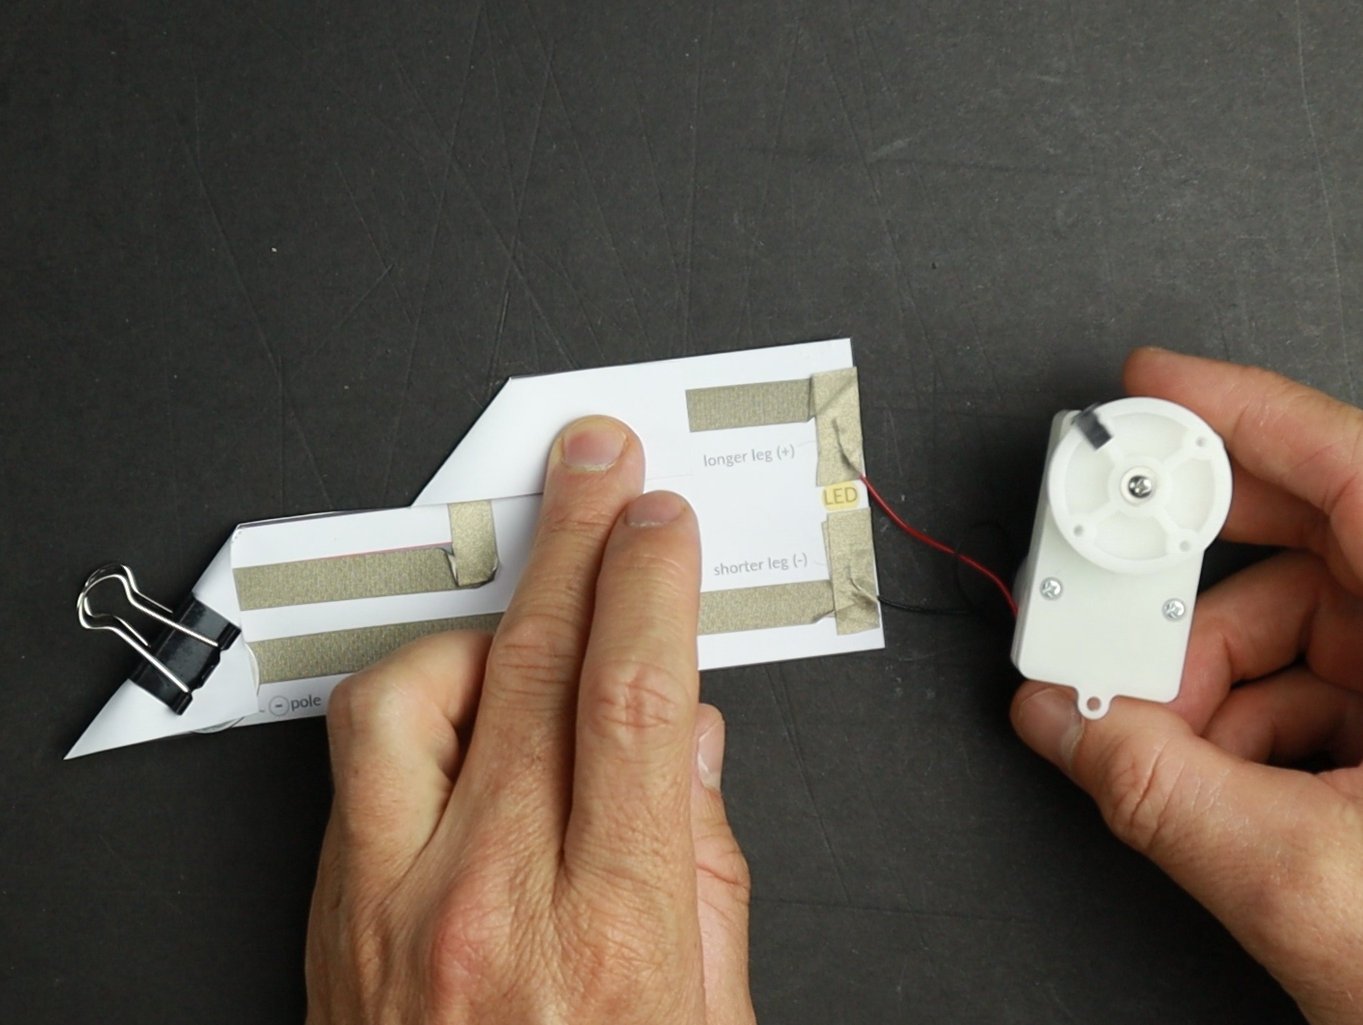
Explore geared motors
Use a geared solar motor and compare its properties to the standard motor: The gearing makes the motor's shaft spin slower but with more power (torque).
Creative Projects Using an Easy Circuit
As you can see, building a paper circuit is an incredibly easy, fun way to experiment with engineering. Here are three highlight projects I designed using this same basic circuit setup. All of these projects are ready for you to build at home or teach to a classroom of kids!
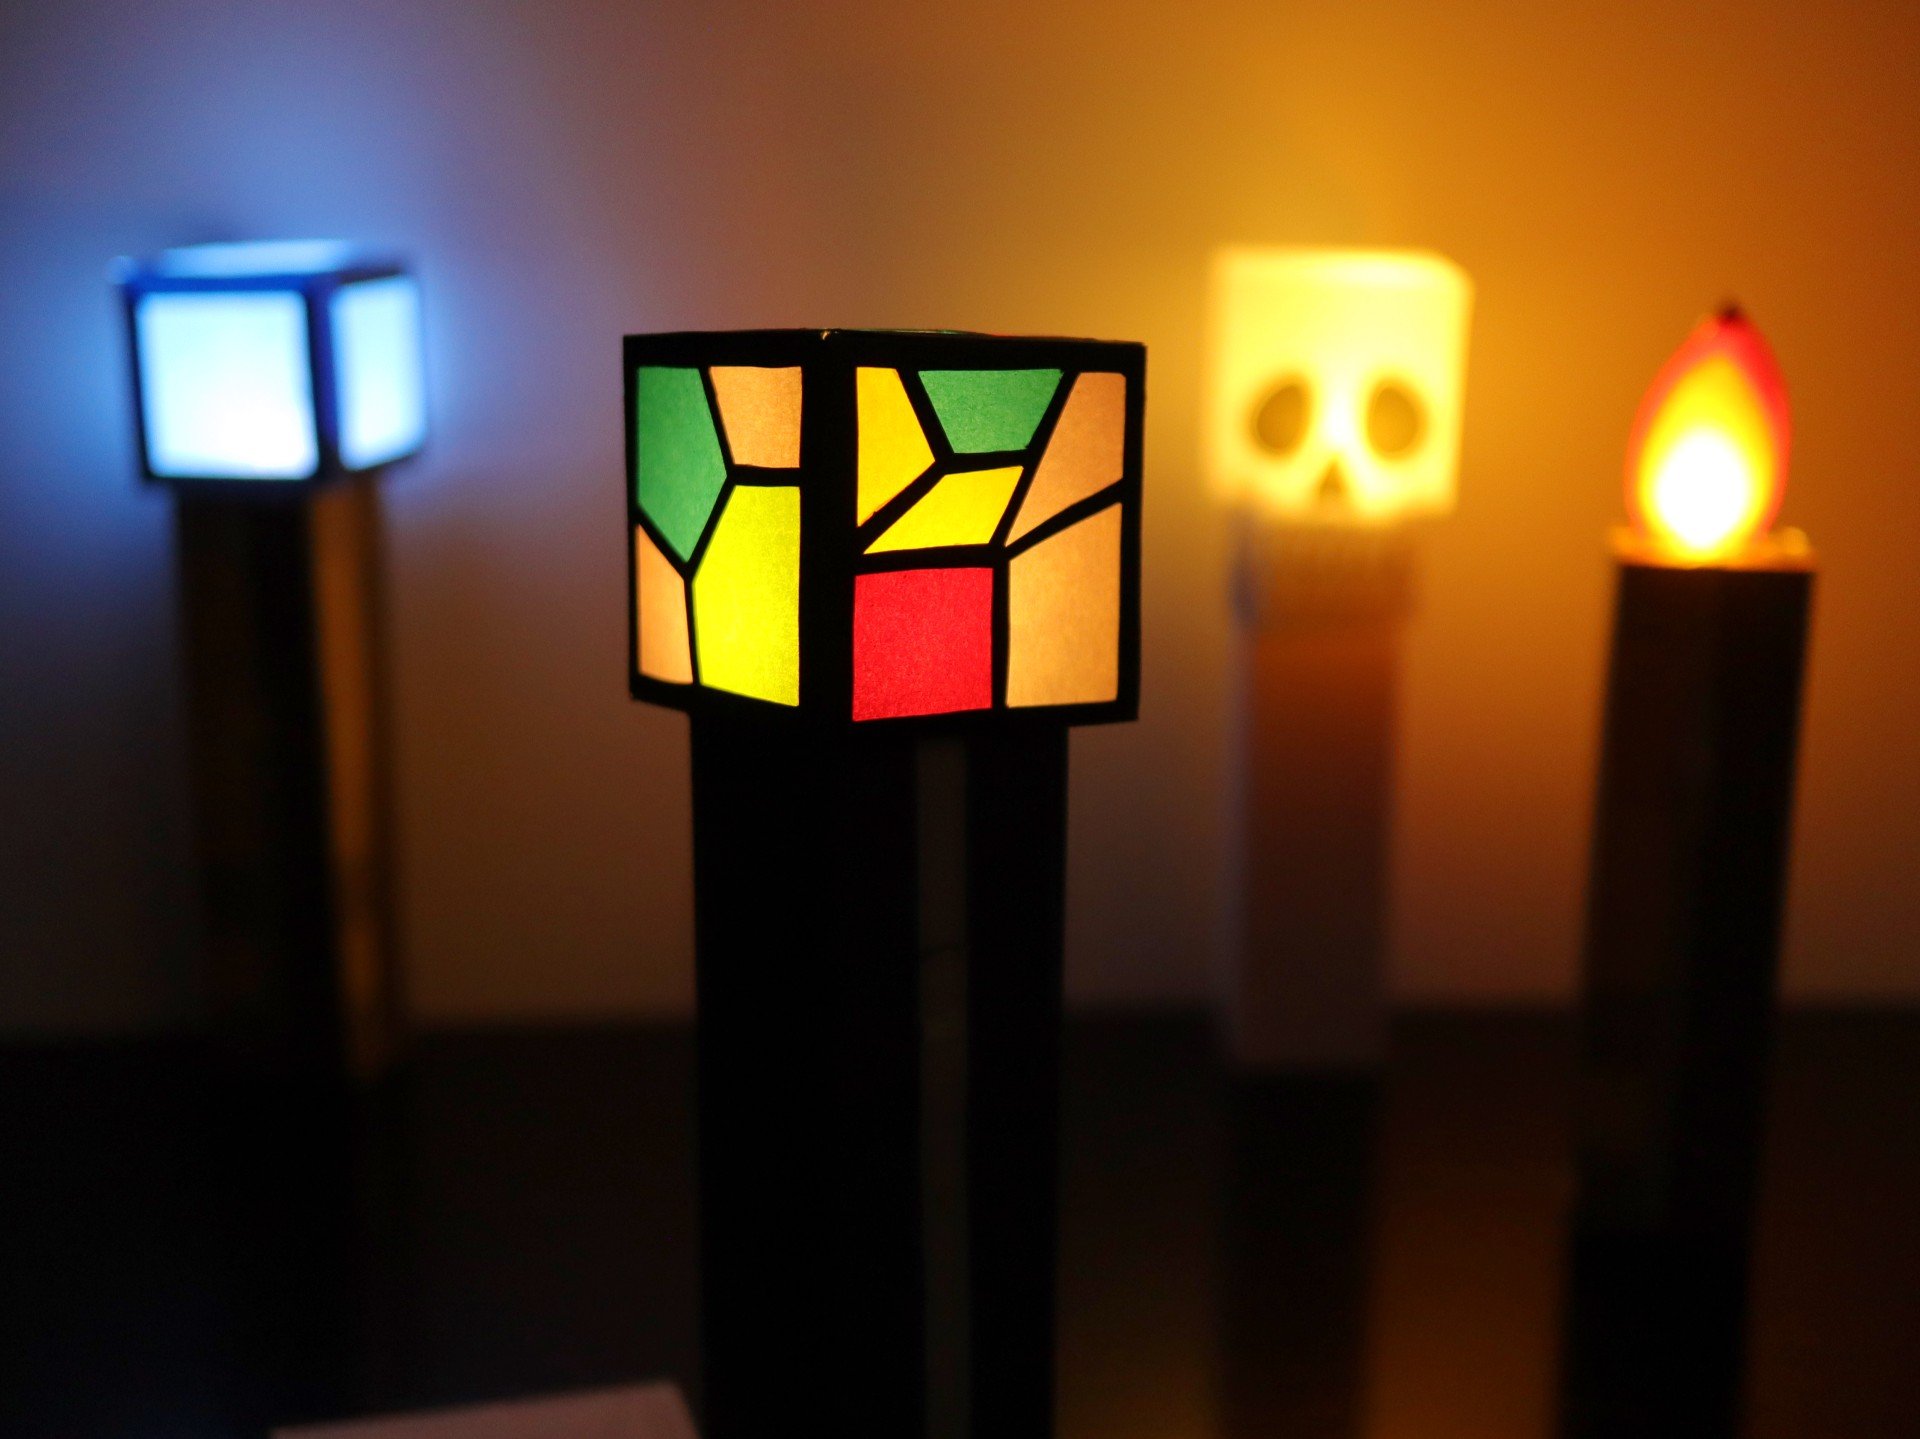
A fun and easy to make gadget, that lights up at the press of a button! Kids can choose from many designs.
Age: 8 and up
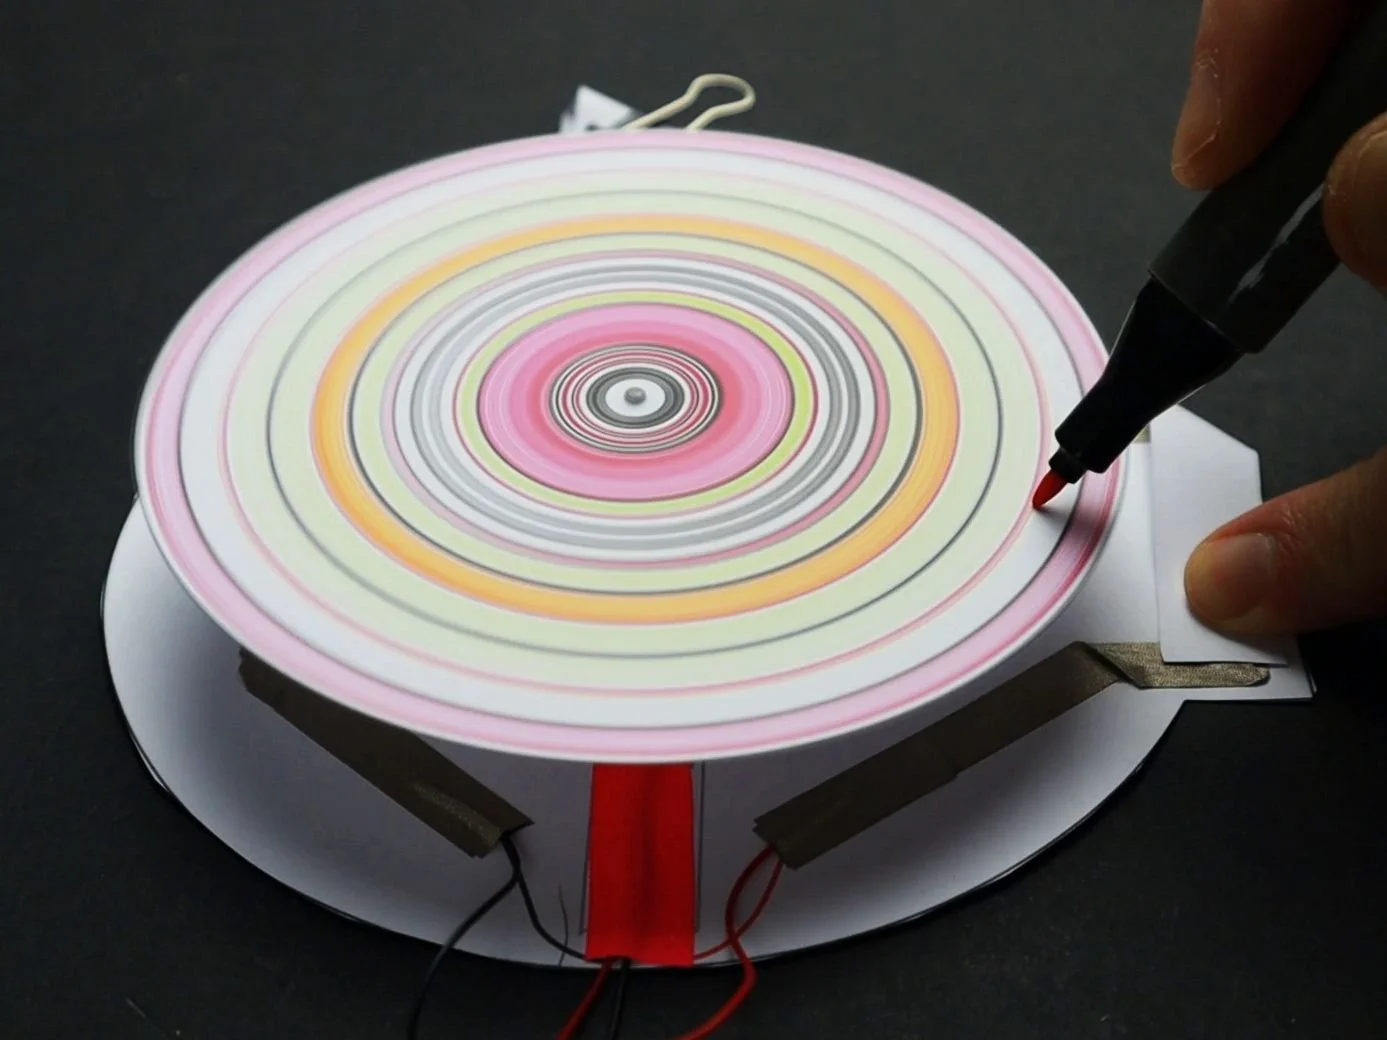

A hilarious robotic project to foster creativity and hands-on experimentation with electronics, mechanics, and design!
Age: 10 and up
Turn the Easy Circuit into a Parallel Circuit
You can easily upgrade your basic layout into a parallel paper circuit! Parallel circuits work best when powering multiple components of the exact same type (like two motors or two LEDs). Electricity always follows the path of least resistance. Using different components (like an LED and a motor) in a simple parallel layout can make the circuit tricky to get working.
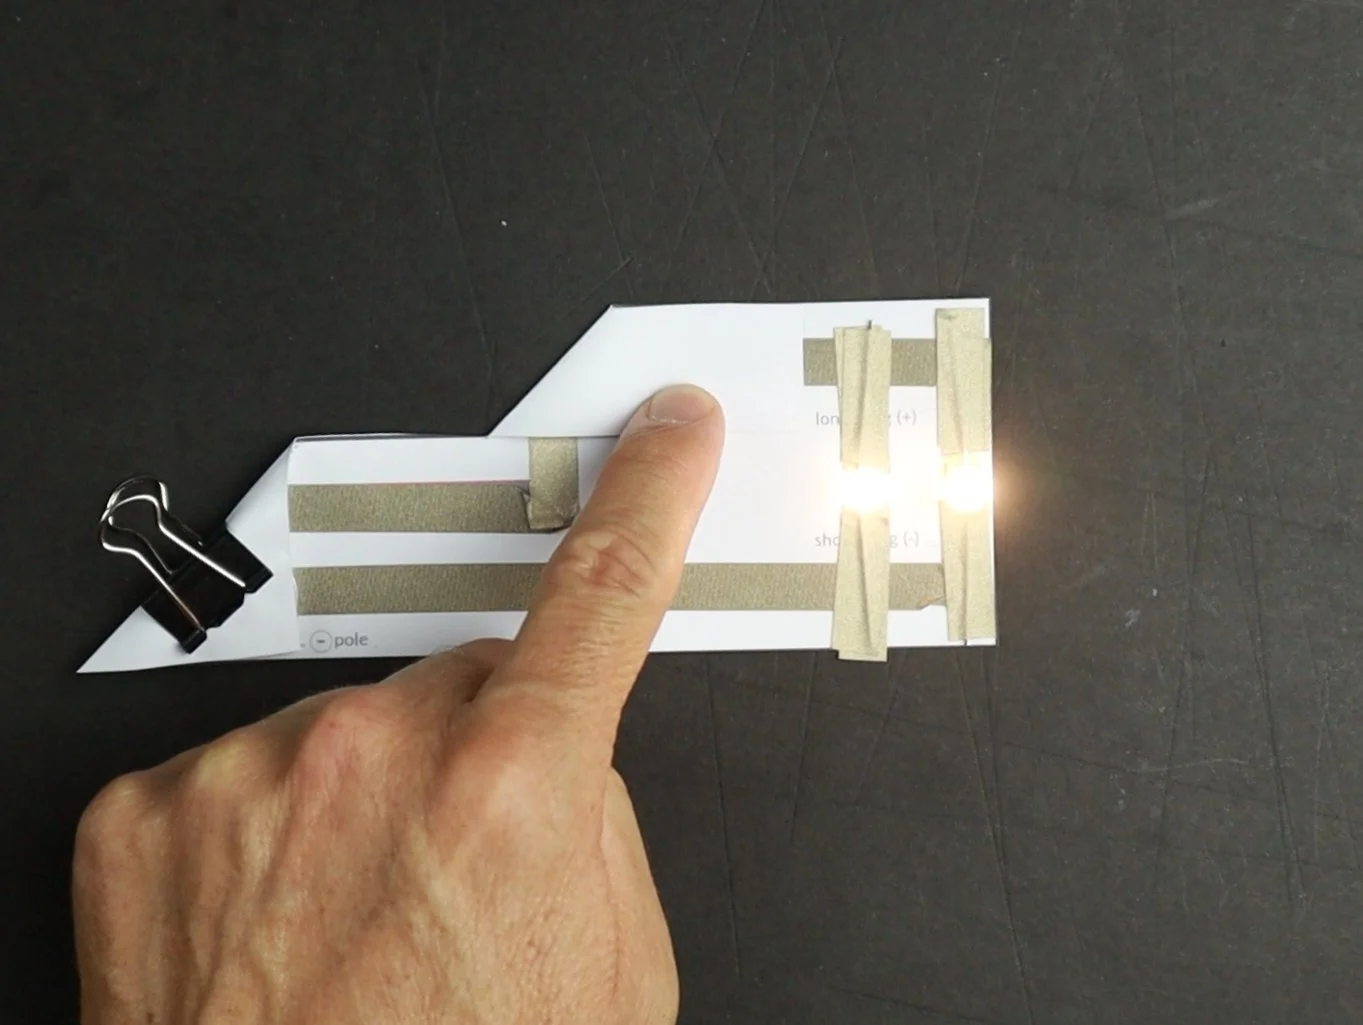
Parallel Circuit Tutorial
Step 1: Extend your circuit to create a second track for an additional component by adding strips of conductive tape. The new tracks must overlap the original tracks to ensure a good connection.
Step 2: Attach your second component (such as a second LED) across the new tracks using more conductive tape. Again, make sure the longer leg points to the positive (+) terminal of the battery.
Step 3: Test your circuit!
Note: Swap in two solar motors or two geared solar motors to see the parallel circuit working with other components.
Creative Projects Using a Parallel Circuit
Here are three creative, hands-on projects that utilize a parallel layout.

This magical DIY book lamp turns itself on and off automatically! An advanced paper circuit project for kids and adults.
Age: 11 and up

Turn a smartphone into a programmable robot and make it remote-controlled, listen to voice commands and much more...
Age: 10 and up

Kids can control the color of these Lightcubes by swiping the paper surface. What sounds complicated actually is very easy!
Age: 9 and up
More Creative Circuit Projects
Of course, you can build highly complex, advanced projects using the paper circuit method. The possibilities are truly endless. Here are a view examples:
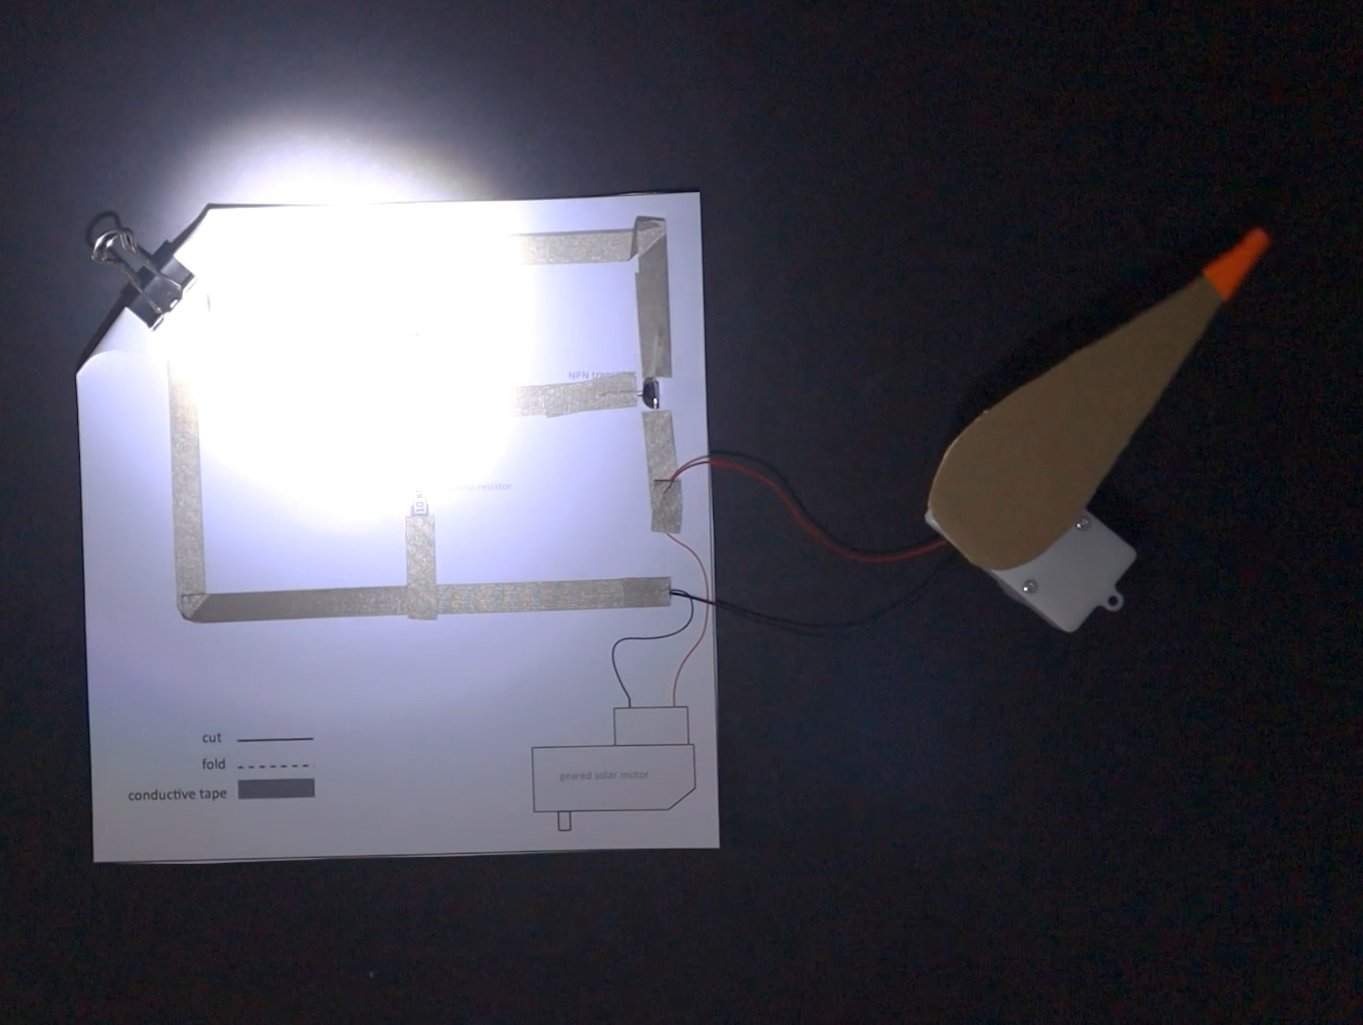
Light-Sensing Circuit: Build a circuit that controls a motor based on the amount of light it receives.

Mothbot (Prototype): Use this light-sensing circuit to build a robot that reacts to light.

Smartphone-Controlled Robot: The sky is the limit! You can even build a cardboard robot controlled entirely by a smartphone using simple components and conductive tape. Click to learn more.
Paper Circuits Tips and Tricks
Here is an older video of mine where you can learn more about using paper circuits for education:
What Many Other Paper Circuit Guides Get Wrong
Wrong Conductive Tape
After reading almost every paper circuit guide on the internet, I noticed there is one thing they all miss. There is a lot of cheap, low-quality tape sold online, and you need to use the right tape to avoid frustration. Read this review from Ansley, who purchased my Minecraft-inspired torch project resource on Teachers Pay Teachers (TpT):
"This is a VERY COOL resource! Everything from Volt Paper Scissors is just amazing. The conductive tape he uses was a game changer for us. VERY complete resource and so easy to use! HIGHLY RECOMMEND!!!"— Ansley D.
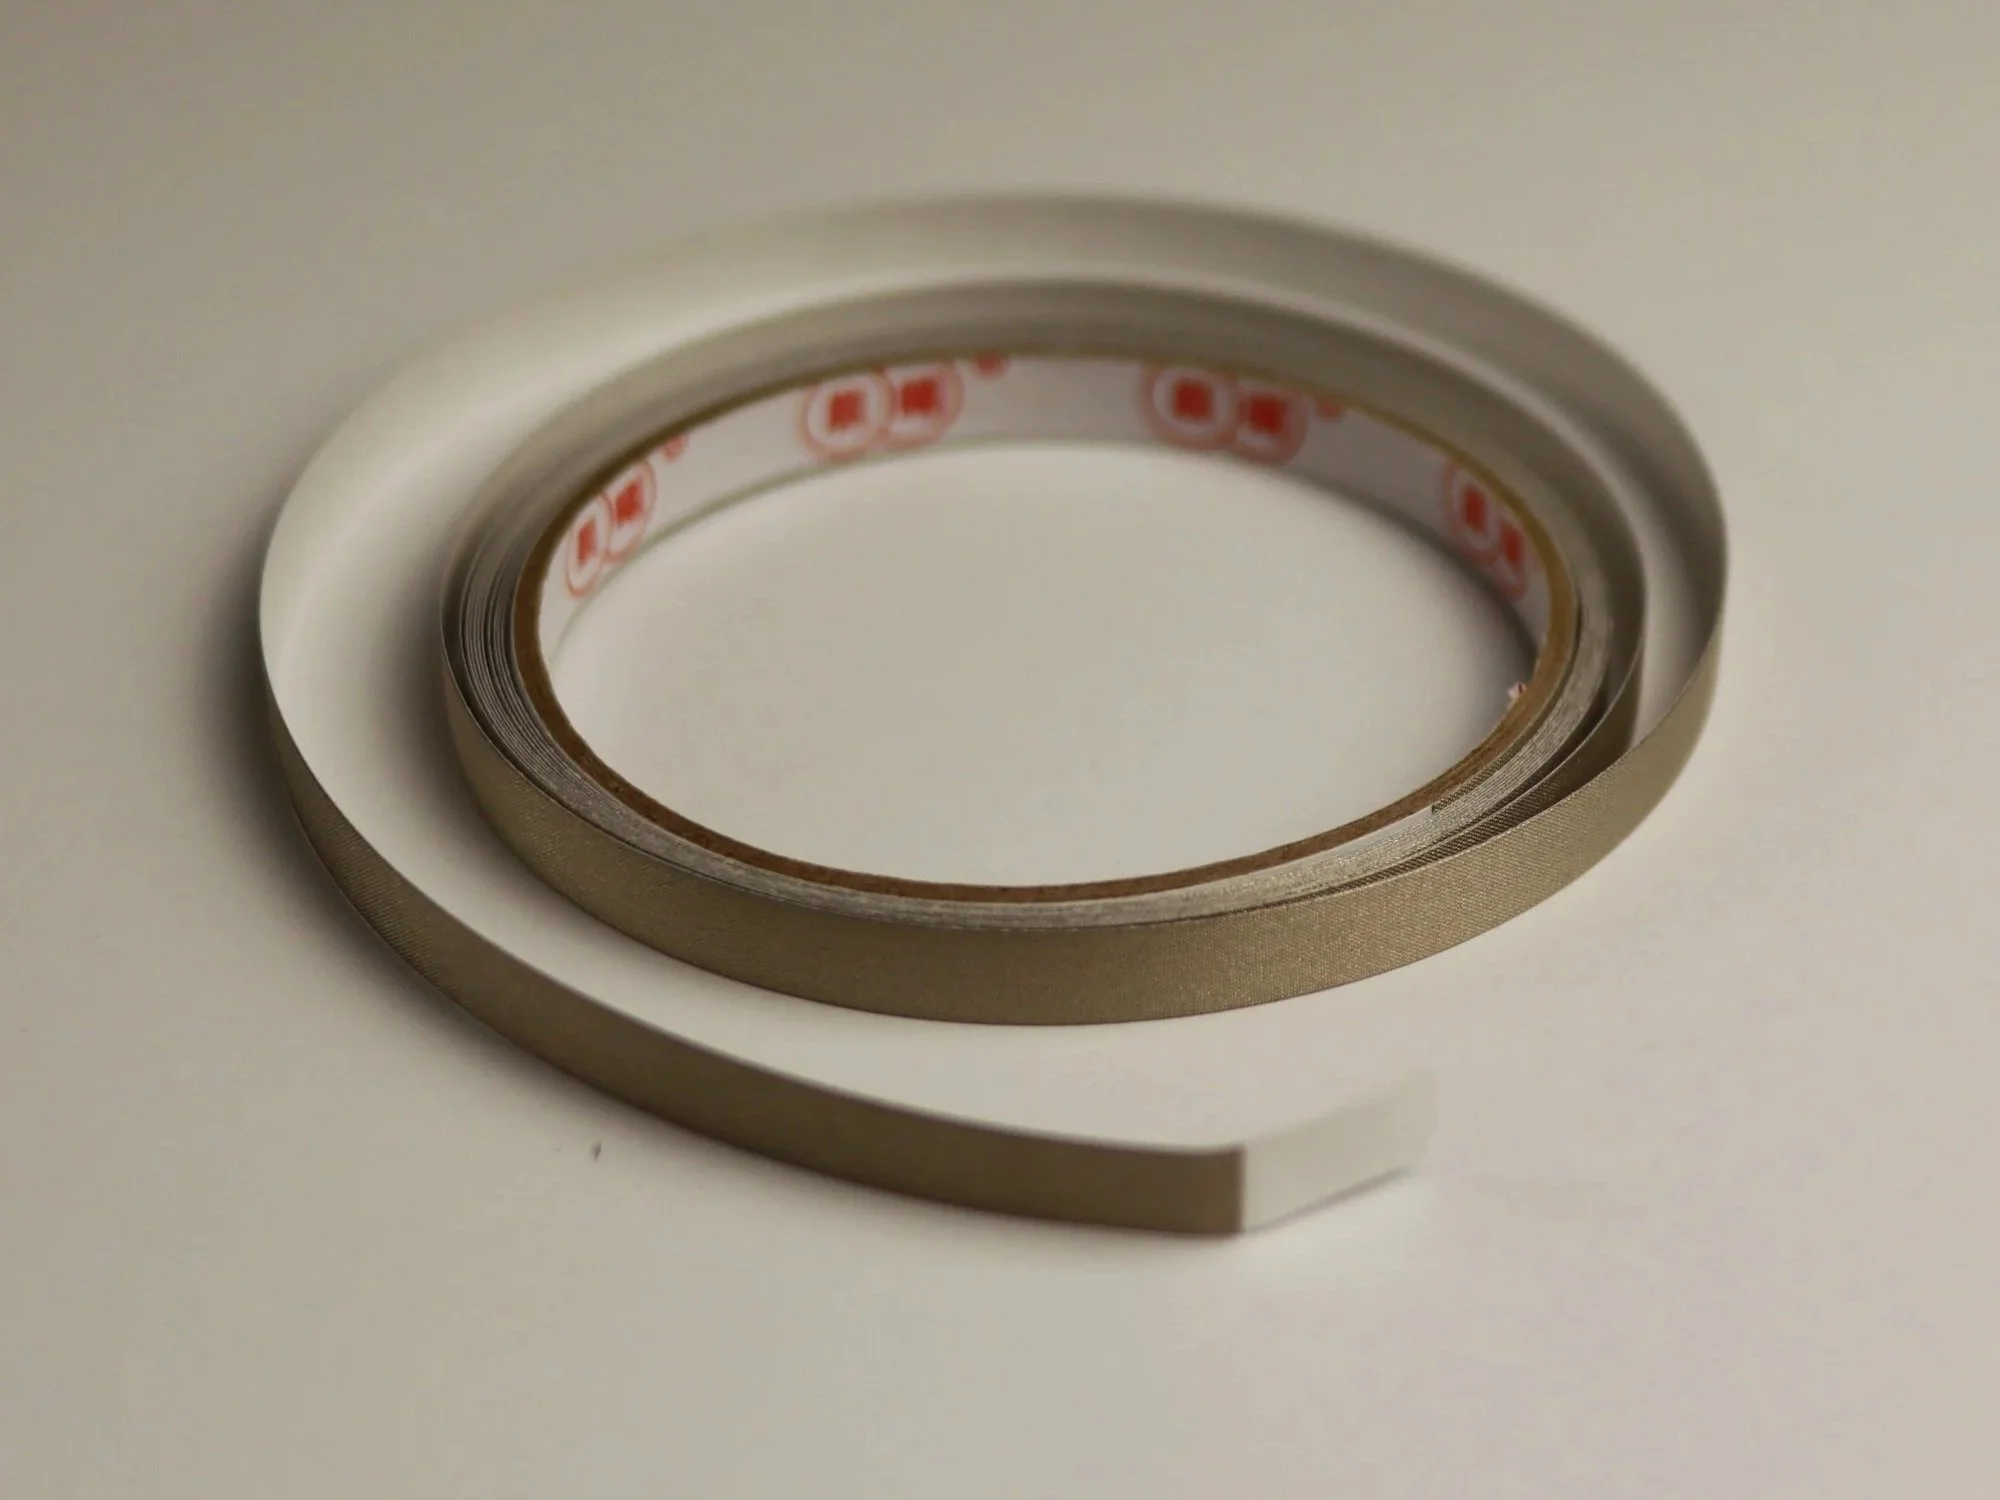
Ansley is completely right. Before launching Volt, Paper, Scissors!, I used standard copper tape for years. While copper tape seems fine at first, the connections somehow degrade after a few days. The amazing projects kids put a lot of work into simply stop working!
Standard copper tape wasn't designed for paper circuits. The tape I use now is specifically designed for educational electronics. It is a conductive nylon fabric tape with a specialized conductive adhesive that maintains strong connectivity. I have paper circuit models that are 6 or 7 years old that still work perfectly today!
Note: Copper tape does have one valid use case. If you need to solder your components down, copper tape is your only choice.
Wrong Components
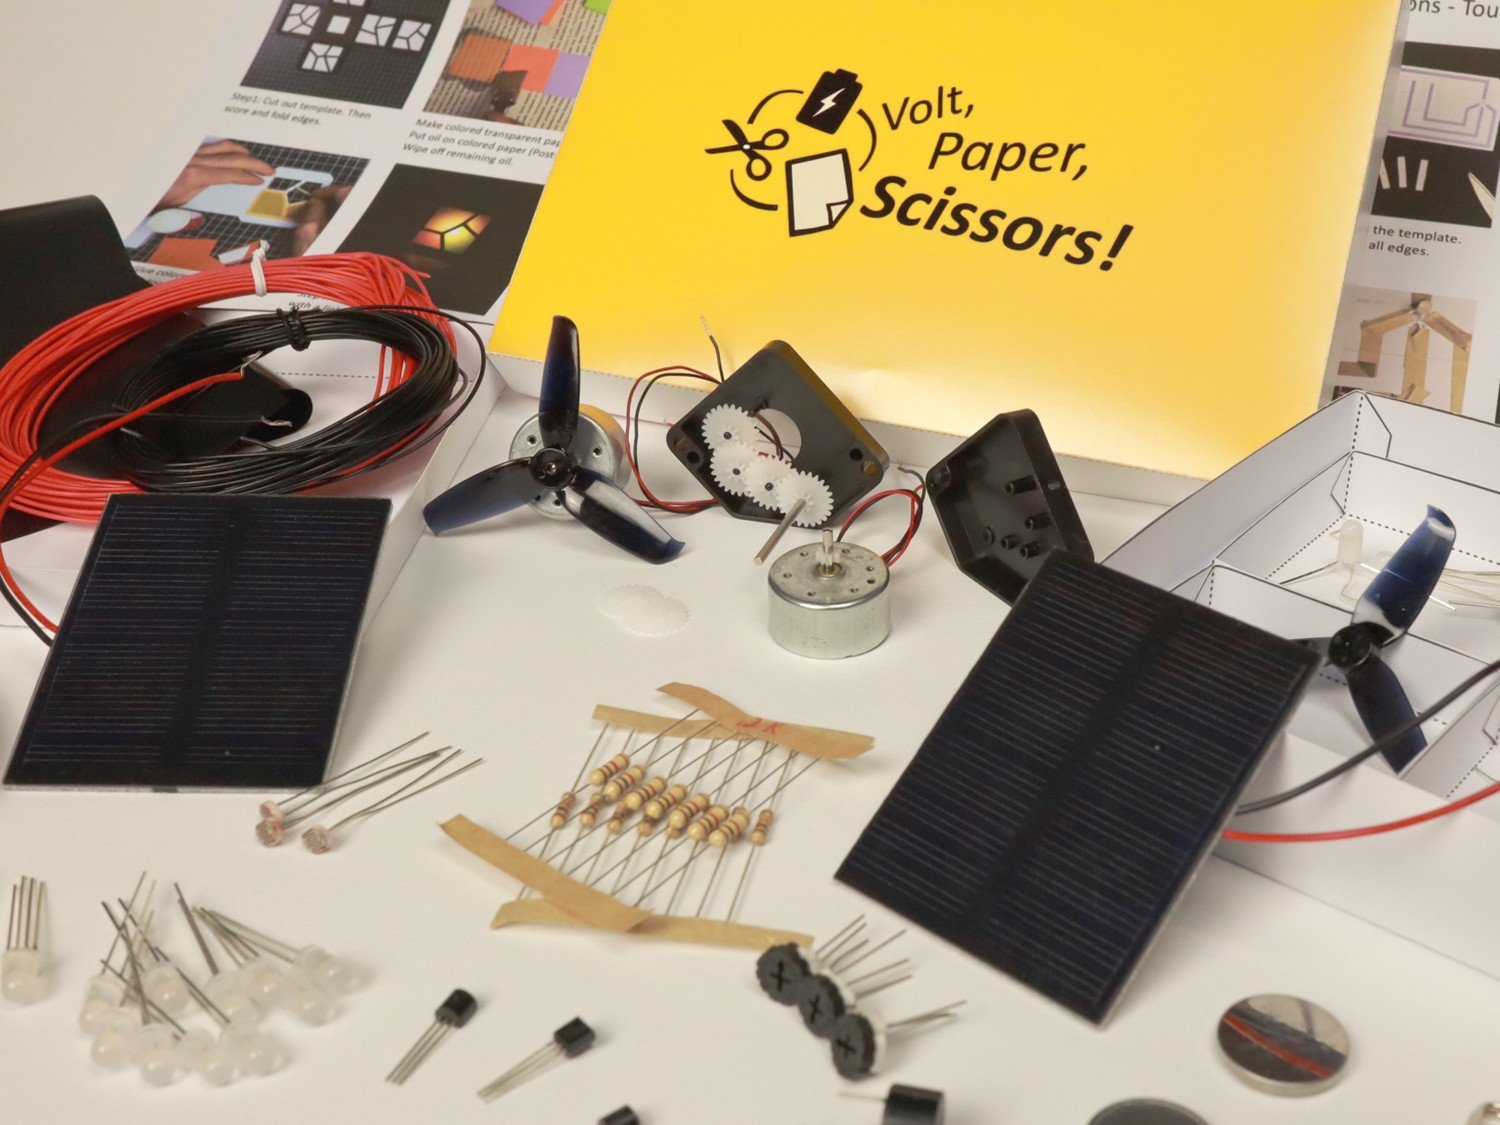
Choosing the right electronic parts makes another huge difference. When I started Volt, Paper, Scissors!, I set a strict rule: all projects must run on just 1 or 2 small button cells. Only for some advanced robots with multiple motors do I scale up to 4 button cells. Button cells are very low-energy, which makes paper circuits safe for experimentation. Even better, two button cells provide roughly the same energy output as a small solar cell—meaning all of my projects can easily be converted to solar power! This also means every component is cross-compatible with others. That is why you can easily swap components to change the circuit, as shown in the easy circuit example above.
You can view my full electronics component list here. To save you time, every template download on my site includes a ready-to-use parts shopping list with clickable links.
Why Not Use Conductive Paint? It Looks So Cool!
You have probably seen viral videos online featuring seamless circuits drawn instantly with a pen, lighting up paper houses or driving toy cars forward.
Unfortunately, the reality is very different. Conductive paint makes quite unreliable electrical connections and breaks apart when you try to fold the paper. It is very difficult to attach components to the painted tracks in a way that creates a lasting, durable connection. I recommend sticking to conductive fabric tape for the best experience!
Paper Circuit Safety
Last but not least, a word about safety. For all my paper circuits I use these little button cells (CR2032). These batteries are a choking hazard for small children. Some projects use up to four of them. The CR2032 is very low energy, making it the safest option for making paper circuits. I have never had any problems with my paper circuits, even when I have deliberately short-circuited these batteries. However, all my recommendations are based on my personal experience. I am not an electrical engineer. Use my work at your own risk.
This work is licensed under a Creative Commons Attribution-NonCommercial-ShareAlike 4.0 International License.

If you want to use my work commercially, write me an e-mail.
If you use or share my work, please attribute VoltPaperScissors.com as the creator of this work and provide a clickable link where possible.
Find more information about me, my project, and the license I use here.