
Don’t miss new content! Follow me:
Introduction
Update
I created a new sub-page that collects all content related this robot. Please check out my DIY Robotics Plattform page to make sure you do not miss anything!
Video Tutorial
Watch the video below to learn everything about this easy to make robot for kids!
Jump to

In Short:
Recommended age: 9 years and older
Skill level electronics: Easy
Skill level paper crafting: Easy (optional: robots body is medium to hard)
Time needed: 90 minutes (for the basic robot, every upgrade is about an hour)
Estimated costs per robot: about 15 Euro or Dollar (7 Euro or Dollar extra for the solar powered version)
Note: Materials can easily be reused for other STEM projects.
Introduction

Kids and old Kids (including myself) love robots and are fascinated by their autonomous behavior and artificial intelligence. But building a DIY robot can be challenging and expensive. Especially if you want to make it together with kids. There are specially designed robot kits for children, but all of them are overdesigned toys that hide the actual process of making a robot inside ready to use components. To change that, I invented a super easy robot just from paper and simple electronics. The brain of the robot will be a regular smartphone!
This is the first part of the process, making a smart robot from very simple materials. For this part, we skip the programming to get the basics right: We start with the movement by using two motors. Then we make the robot controllable via a (wired) remote control. Afterward, we make the robot more sustainable with a solar cell as the power source. To finish, we make the robot's body and two cute light-up antennae using LEDs. The best thing: Building the Easy Robot will be the foundation for part two: The programmable Smartphone Robot.
So you can start very basic and upgrade your robot step by step. Since the robot only uses simple electronics and easy paper circuits (no tools required!), this is a perfect STEM or STEAM project for classrooms or at home.
Get Started - It’s Easy!
Visit my Teachers Pay Teachers store to download the following:
All the templates for the Easy Robot and the Smartphone Robot
A PDF tutorial for the MakerBot
A coding guide on how to use MIT App Inventor for Smartphone Robotics
My electronics shopping guide
And much more!
Included in every download

Templates
All my templates are tested and ready for printing (PDF). Use them for yourself, your children or for a group of kids in class.
Download a free sample of my Easy Circuit template here.

electronics shopping guide
Making this project is much easier when using the exact same conductive tape and electronic components. Use my shopping guide to order everything you need.
Looking for free downloads? This website has become more than just a hobby for me, so I have decided to charge a small fee for my templates.
Basic Robot - Preperation
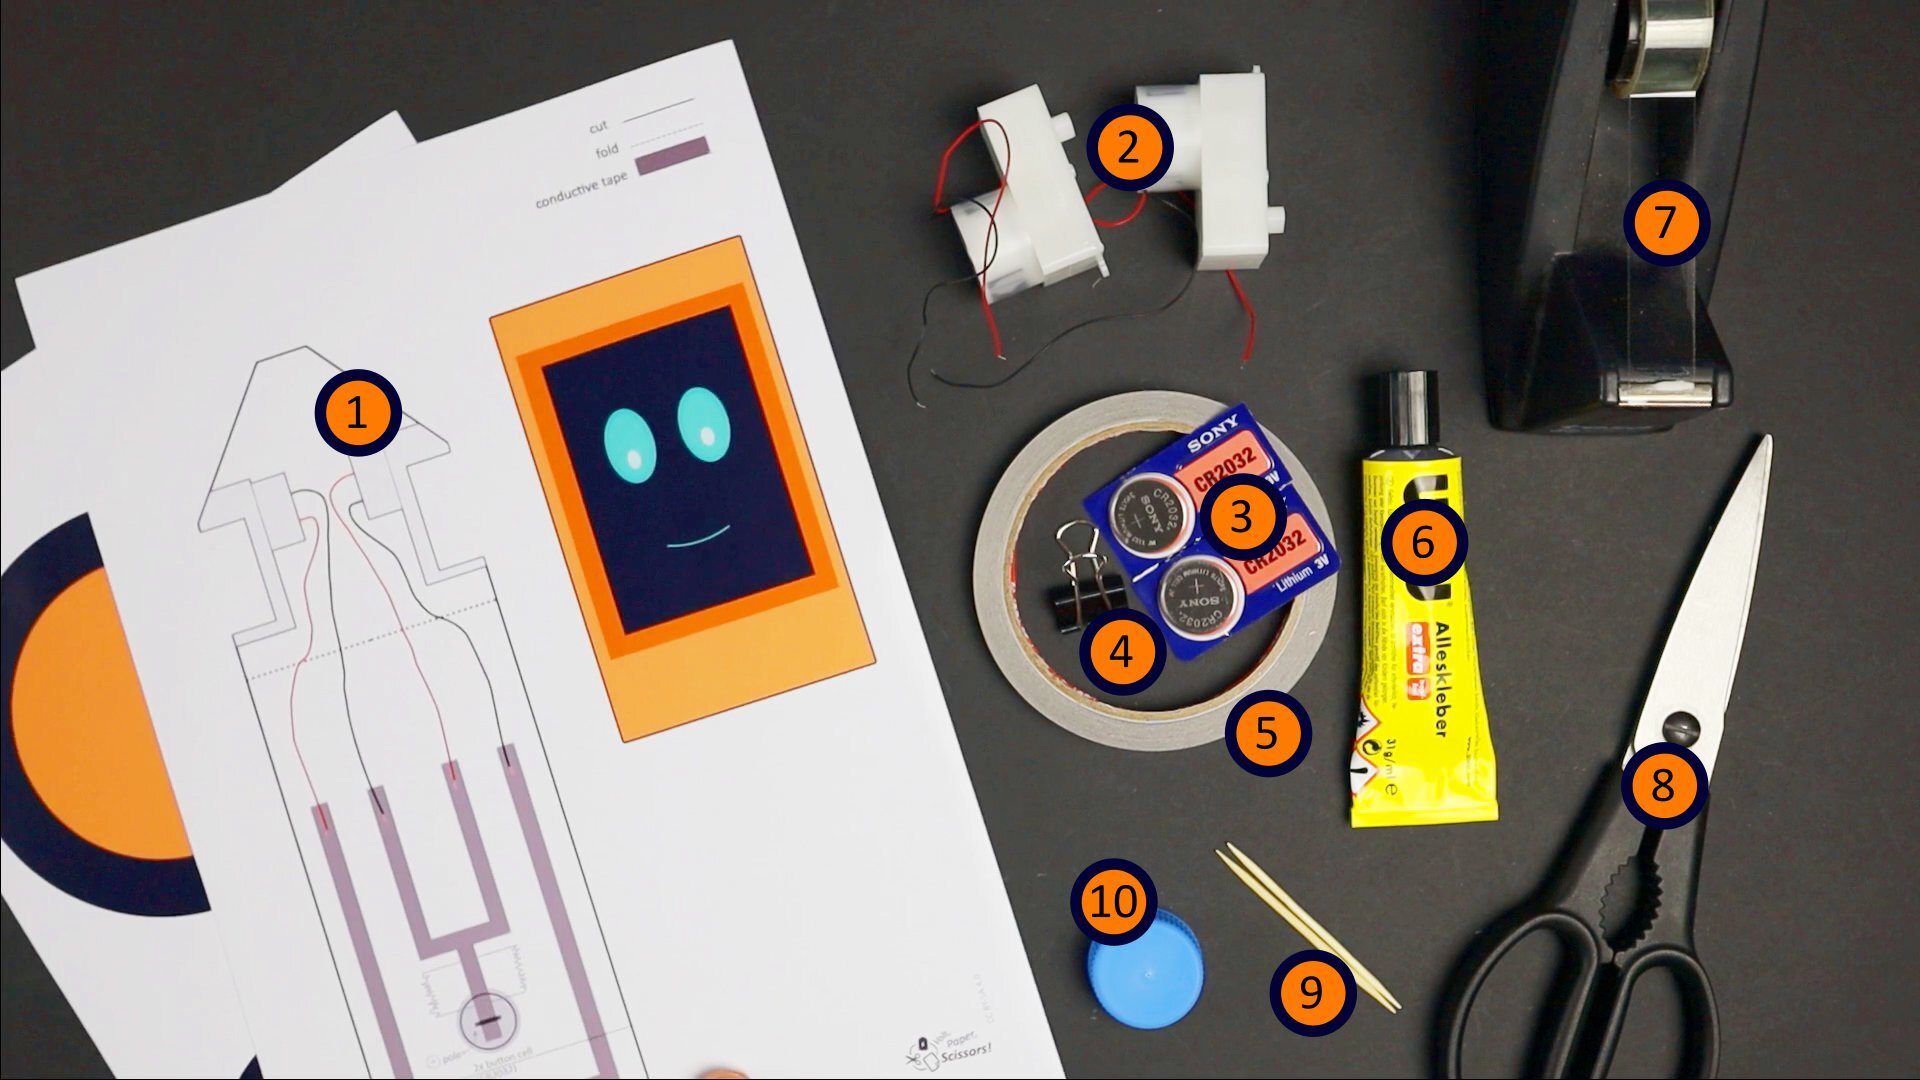
Materials:
The printed template
Two geared solar motor (Solarbotics or Sol-Expert are great manufacturers)
Two three volt button cells (CR2032)
A binder clip
Conductive tape with conductive adhesive
Glue
Transparent tape
Scissors
Two toothpicks
Bottle cap
Not in picture: cardboard and hot glue

Tip: Strip more of the wires insulation before giving the motors to kids (3-5 mm bare wire is fine). This ensures a good connection between the conductive tape and the motors.
Printing the templates
Print the templates on regular paper. If you want the robots design and the wheels to shine really fancy, you can use glossy (photo) paper. This kind of paper makes the colors very bright and saturated.
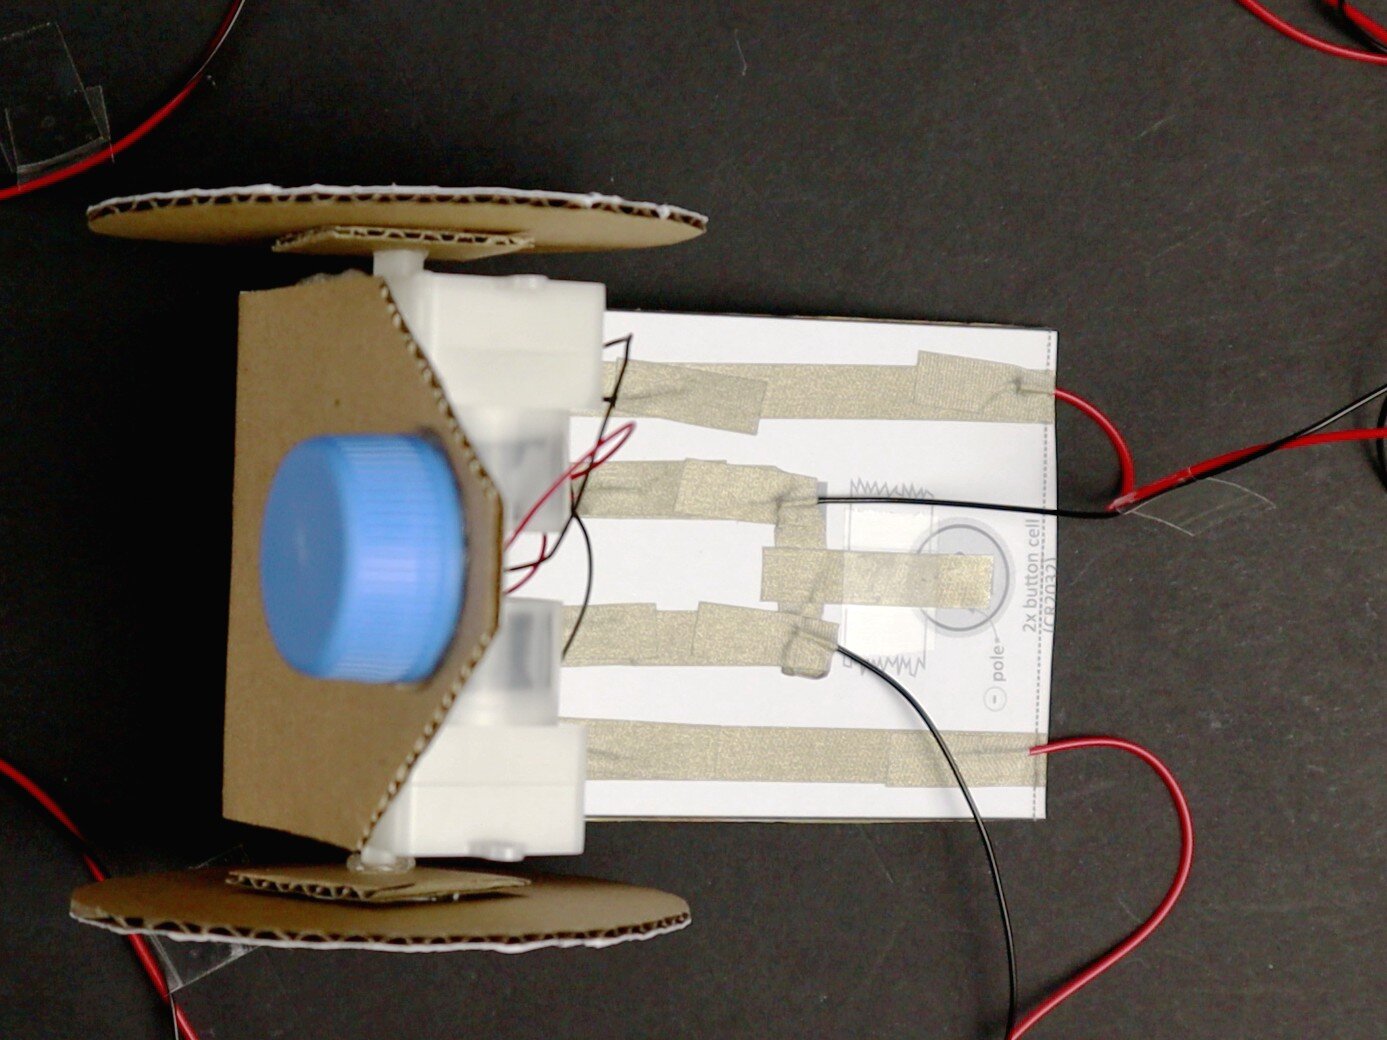
Basic Robot - Tutorial
We start super simple with just two motors, a battery and conductive tape!
Check out my video tutorial above the watch to the whole process. Here are the basic steps:

Prepare the Chassis
Glue the template onto cardboard and cut out the shape. Fold the chassis at the dotted line.

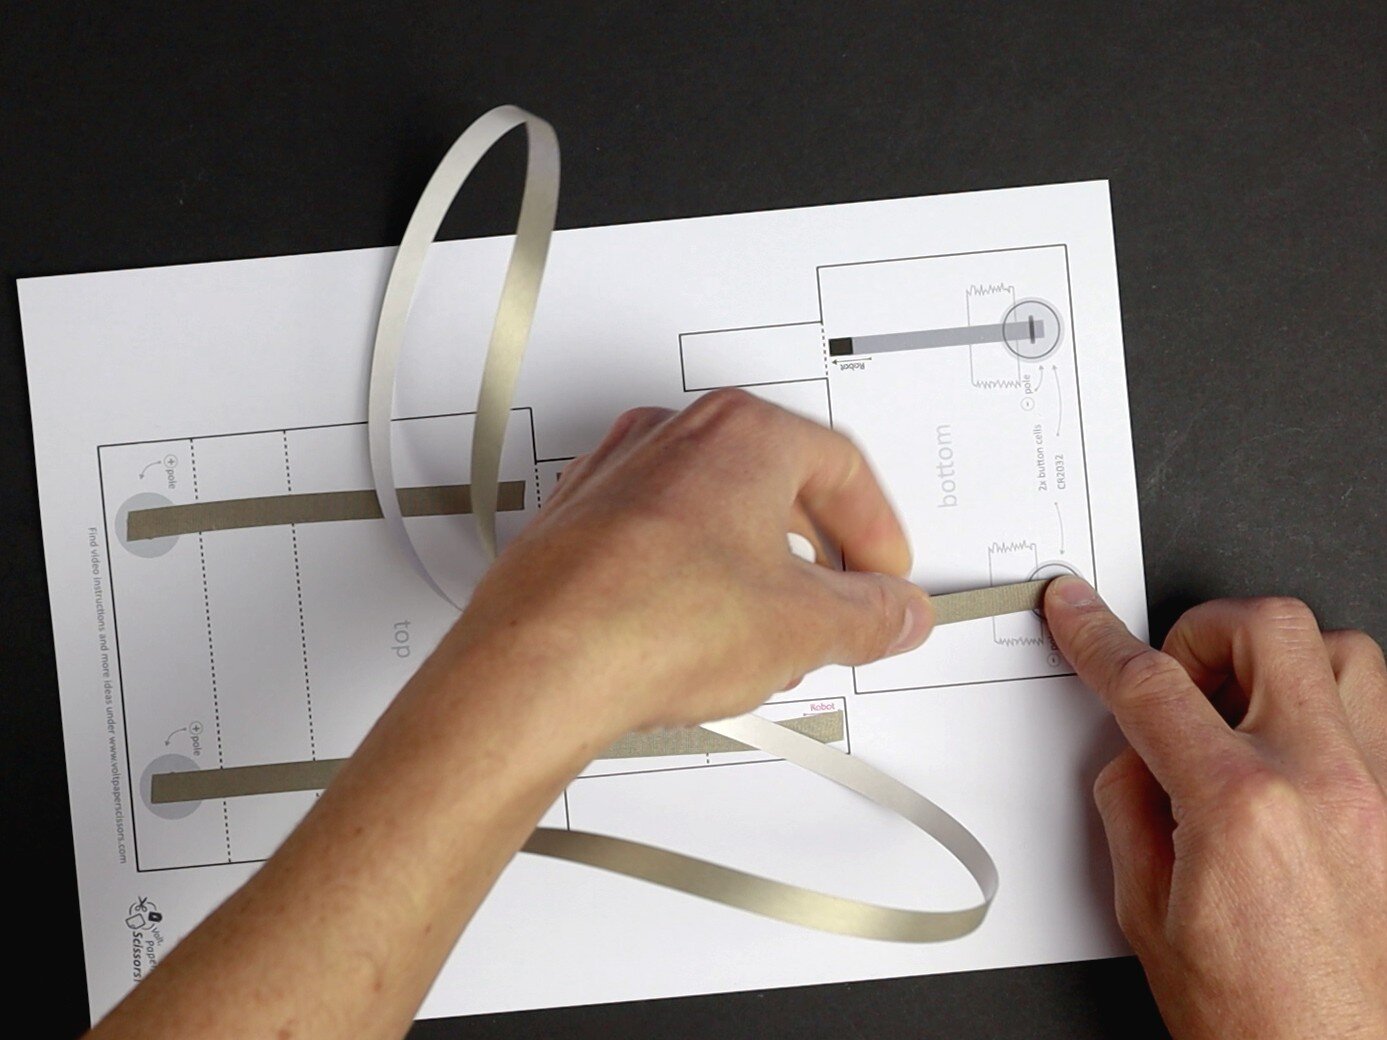
Trace the Circuit
Trace the circuit with conductive tape. Attach a strip of regular tape at the marked spot. Learn more about paper circuits here.

Connect the motors
Glue the motors to the chassis. Connect the wires of the motors to the circuit tracks of the chassis with conductive tape.


Finish The Robot
Cut out two wheels and glue them to cardboard. Attach the wheels to the motors.
Use the bottle cap as a third weel at the back of the robot.
Attach a stack of two button cells to the circuit using a binder clip and test your robot!
This is the basic robot. All upcoming steps are optional.
Note: The basic robot will be quite slow and will get slower over time. Give the batteries a rest and your basic robot will work again! Once you have finished the remote control, your robot will be faster because it uses 4 batteries instead of only 2.
If something is not working
Important: If one or both motors are not working there might be a loose connection where the wires are connected to the conductive tape. Strip more of the wire’s insulation before attaching them with conductive tape to solve this!
If your robot is not driving at all:
Take out the batteries. If the batteries do not feel slightly warm attach the batteries again. If they feel slightly warm there is a short circuit somewhere:
Check for short circuits in the circuit of the robot. Check if the transparent tape is attached correctly.
Check for gaps in the circuit.
Make sure that the motors can rotate freely.
If your robot turns on the spot:
Find the backward spinning motor. Connect the black wire where the red wire used to be and vise versa. This reverses the direction of rotation.
If your robot drives backward:
Exchange the red and black wires of both motors. See the above tip for more information.
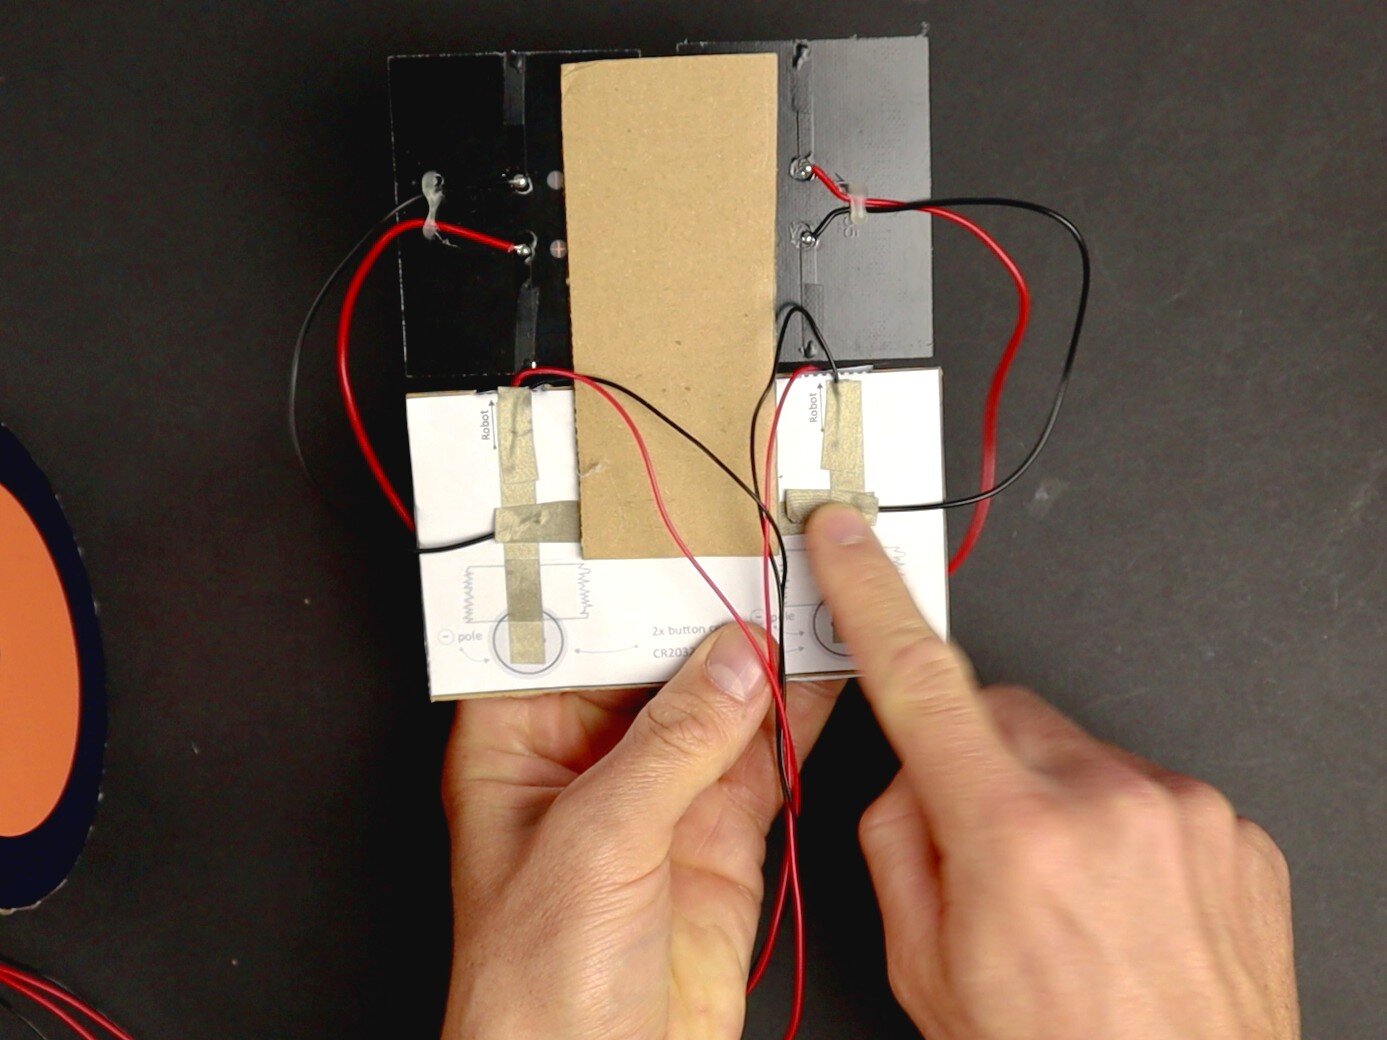
Upgrade 1: Remote Control
With this remote, kids can control their robots easily!
Materials needed
The printed template
Two additional button cells (CR2032)
An additional binder clip
Flexible red and black wire (3 meter each)
Trace the circuit
Use conductive tape to trace the circuit. Add transparent tape for insulation at the marked spots. Learn more about paper circuits here.

Prepare the remote
Glue the bottom side to some cardboard and cut out the shape. Proceed with the top side. Fold over the switches and prepare the battery holders.

Prepare the wires
Prepare two red and two black wires of about 1.5 meter length. Strip all wires at both ends using a wire stripper.
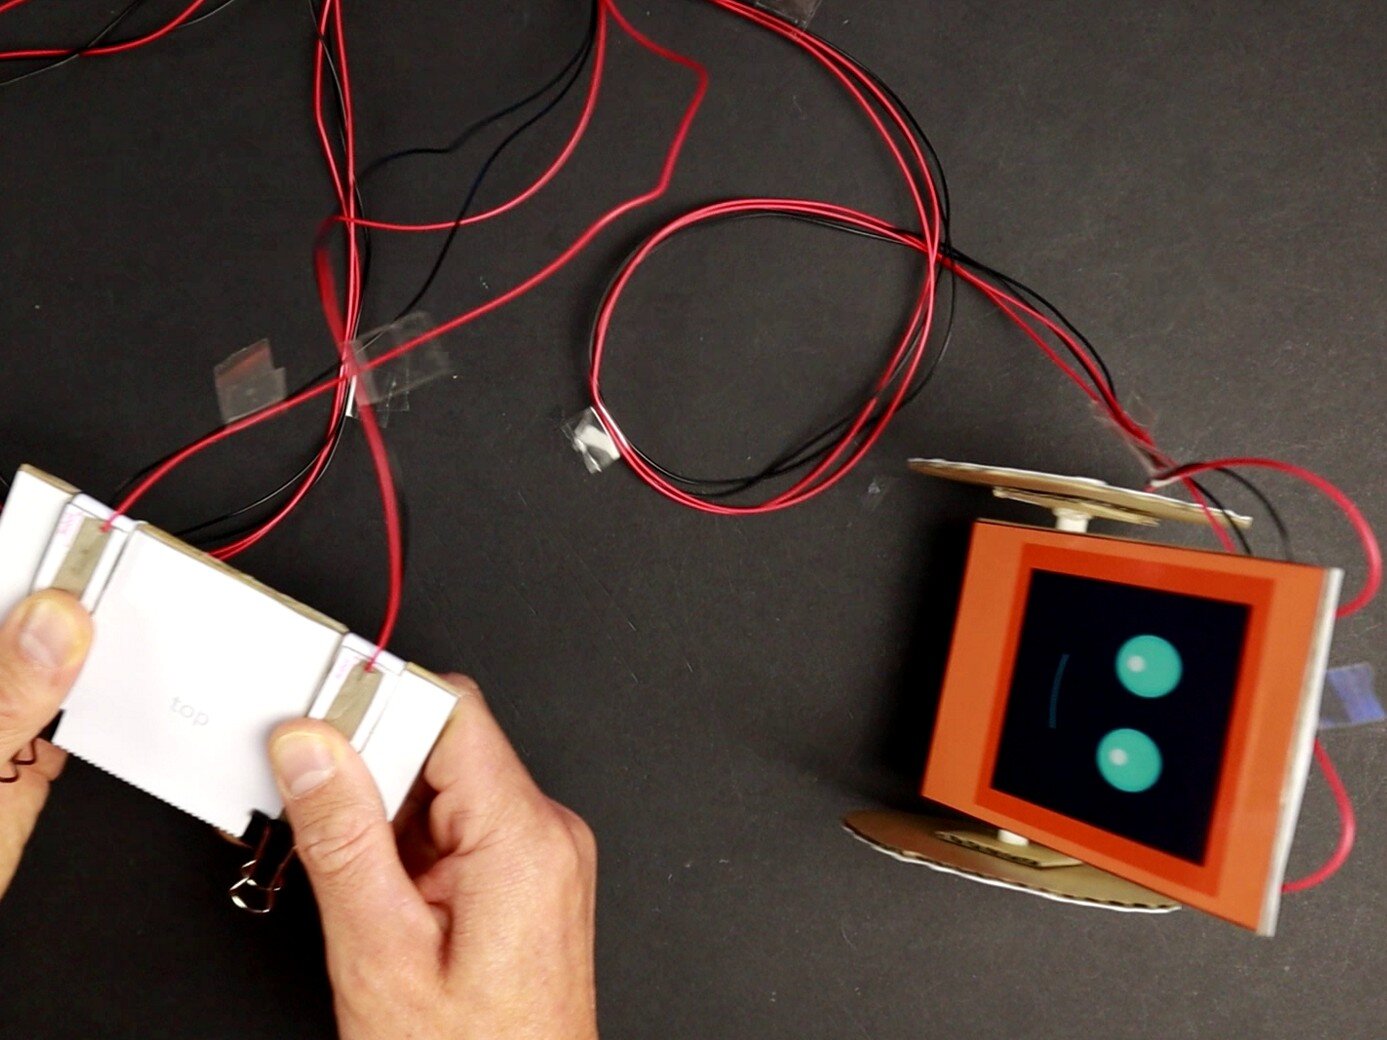
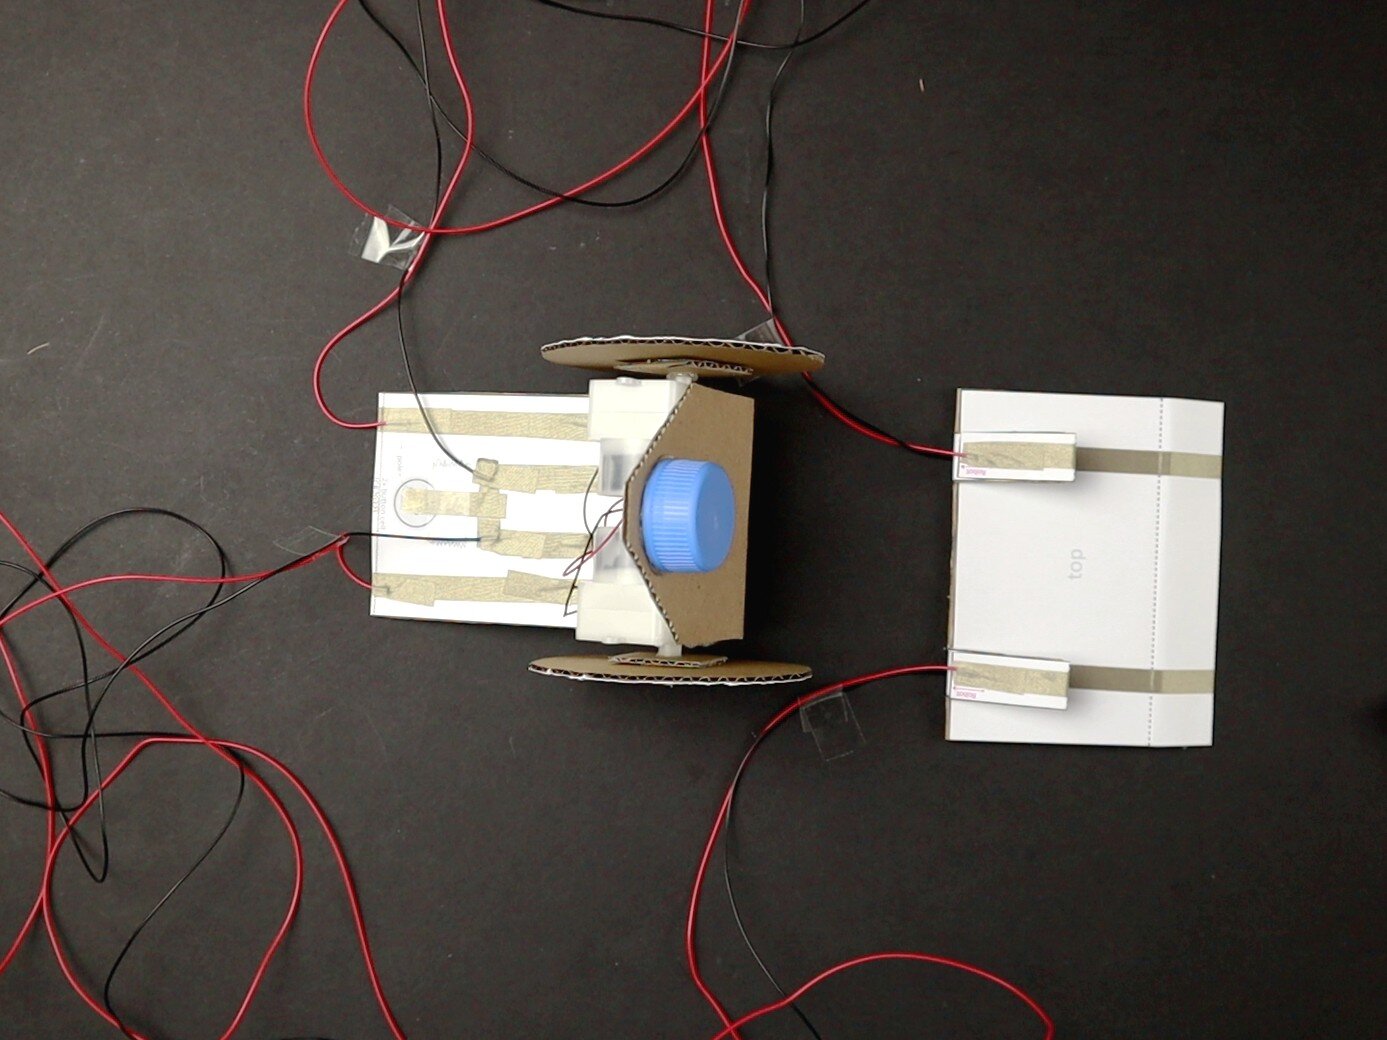

Finish your remote control
Cut the battery holder from the robot to separate the outer two tracks. Attach the two wires from the left switch of the remote to the left tracks of the robots circuit and vice versa. The black wires go to the inner tracks of the robot, the red wires to the outer tracks.
Connect two stacks of two CR2032 to the remote using binder clips.
Test your remote!
Tip: If your wheels need more grip when dragging the wires, add a small layer of hot glue to the edge of the wheels.
Check out my video tutorial above for full instructions.
If something is not working
If your robot is not driving at all:
Take out the batteries. If the batteries do not feel slightly warm attach the batteries again. If they feel slightly warm there is a short circuit somewhere:
Check for short circuits in the circuit of the remote. Check if the transparent tape is attached correctly.
Check for gaps in the circuit of the remote. Check for bad connections at the wires. Did you strip the wires correctly?
Make sure that the motors can rotate freely.
If one or two motors rotate backward:
Connect the black wire coming from the remote where the red wire used to be and vise versa.
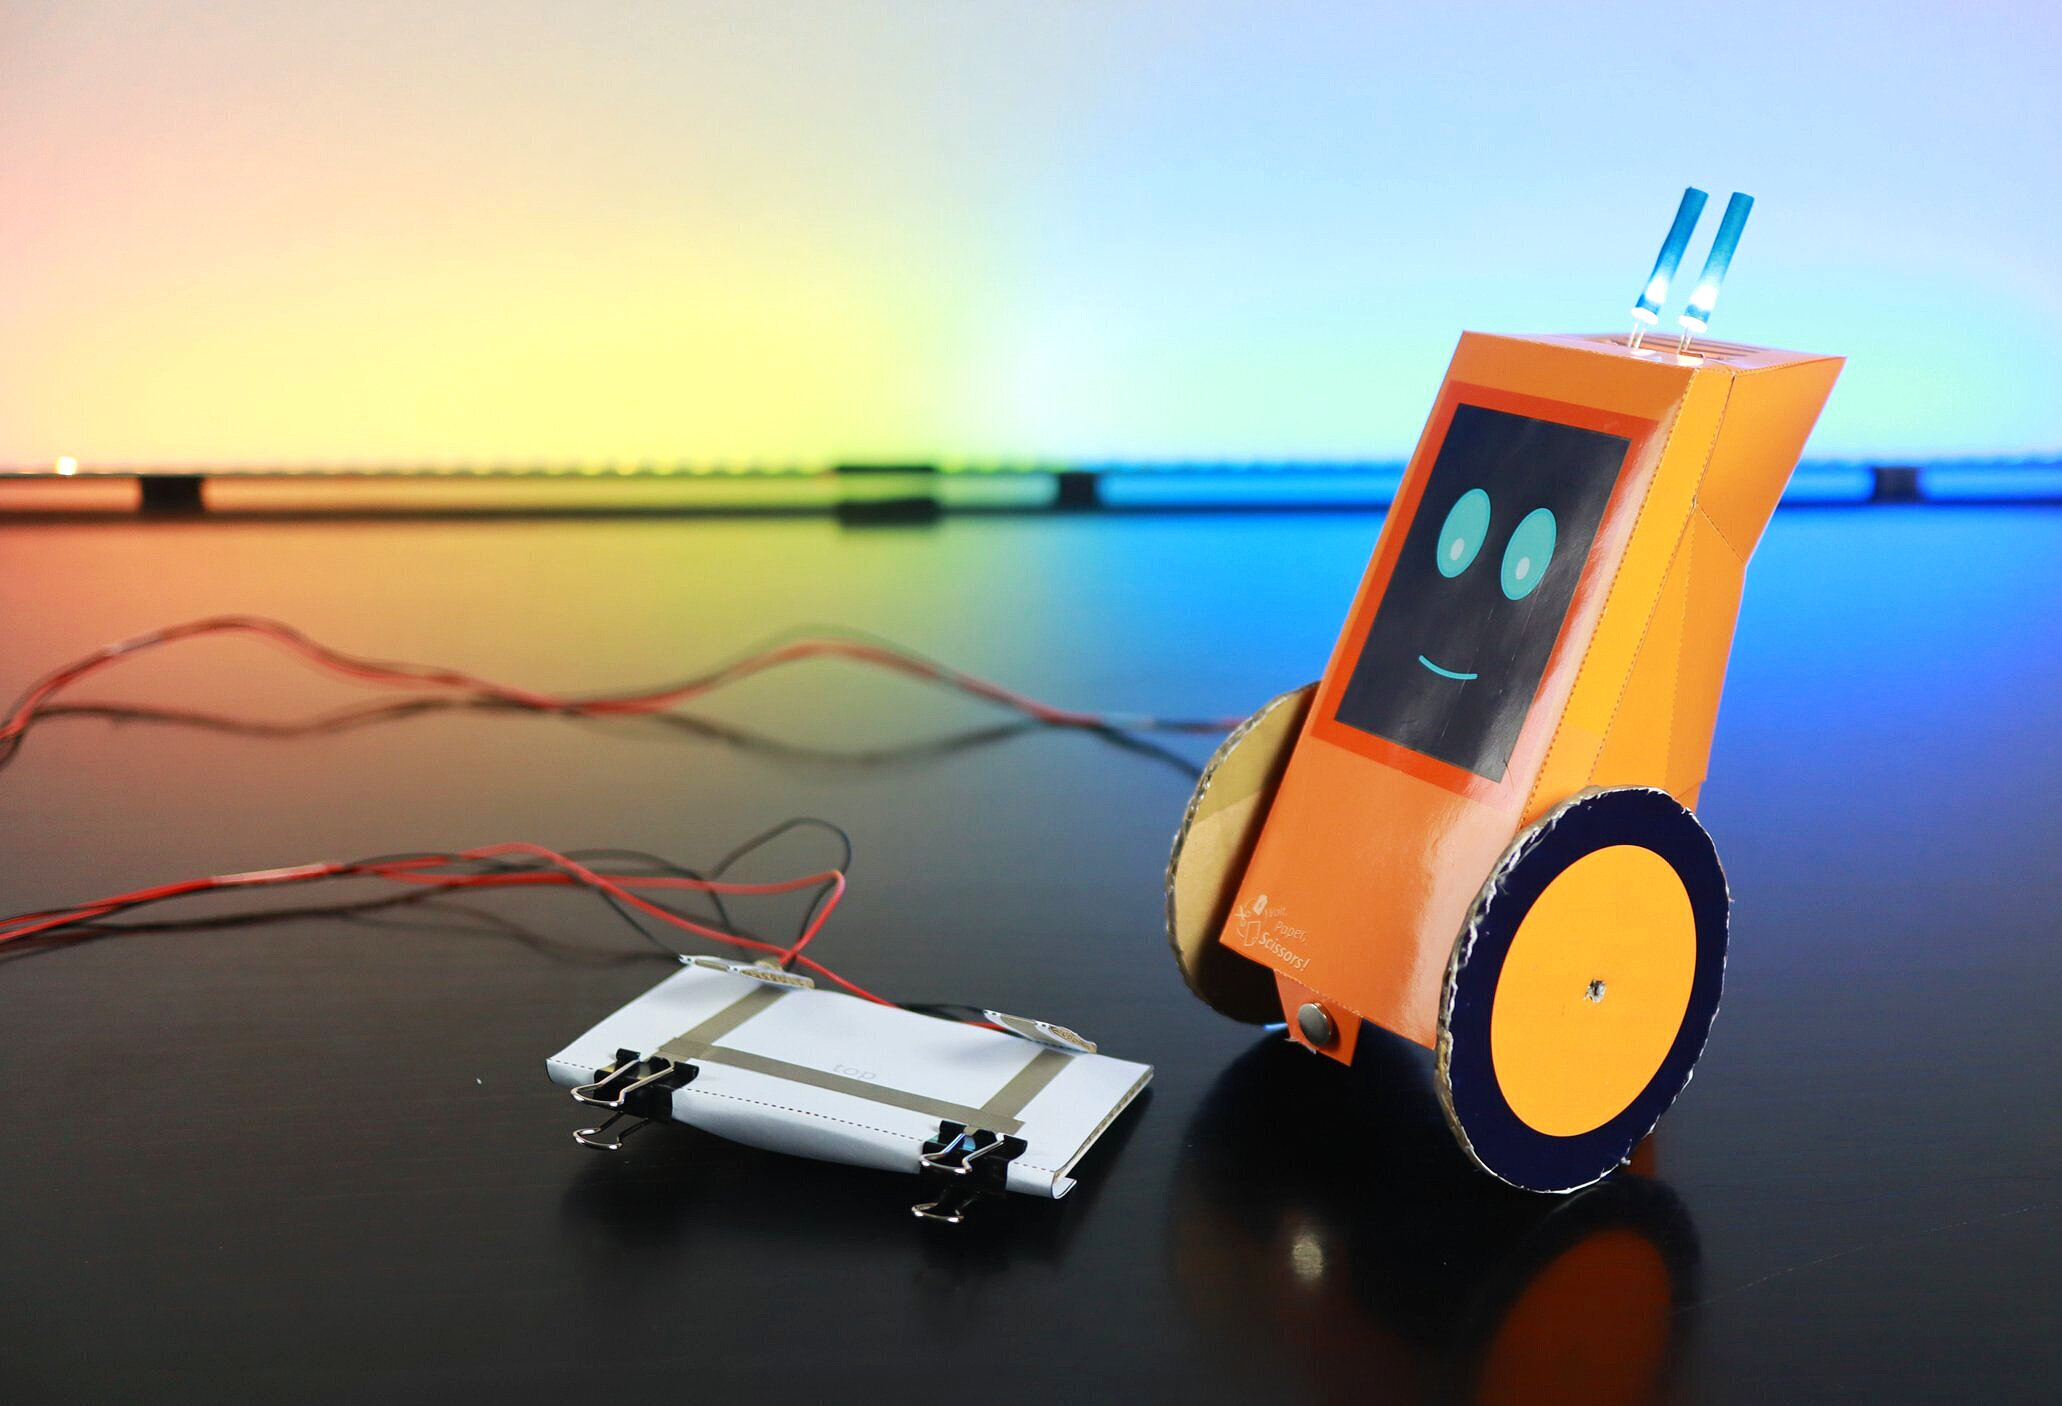
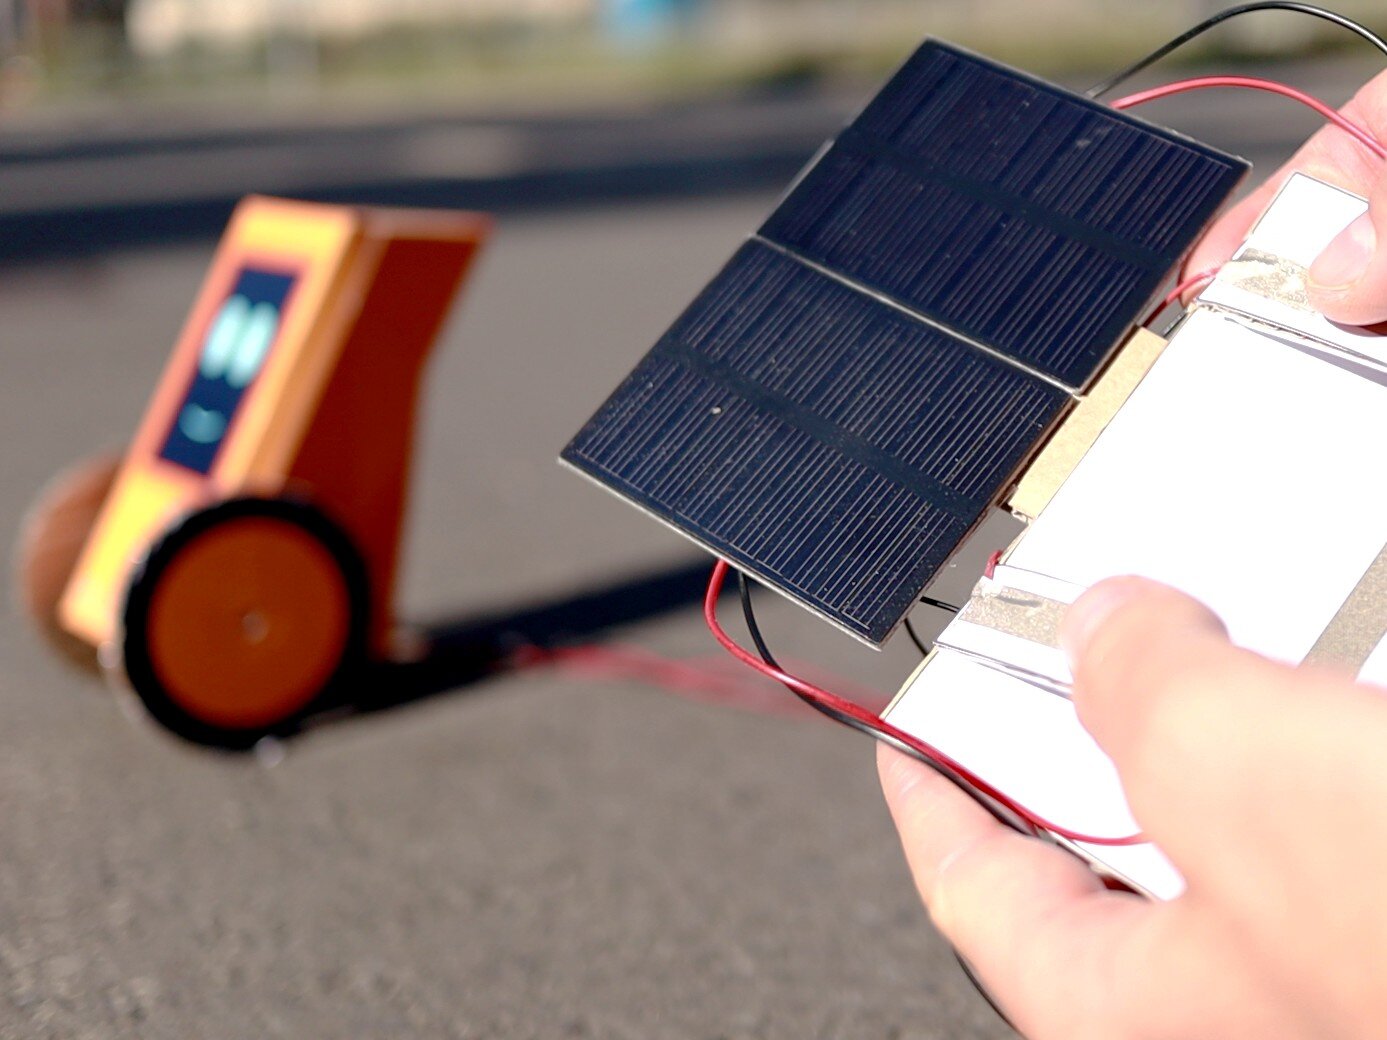
Upgrade 2: Solar Power (Remote Variation)
Teach kids about sustainabilty and renewable energy with this solar power upgrade!
Materials
The printed template
One or two solar cells
Note: Instead of using this template you can prepare your existing remote by cutting the battery holder and connecting the right and left circuit.


Add solar cells to your remote
The solar cells take the role of the batteries. You can use one or two solar cells. Connect the red and black wires from the solar cells to the circuit:
black wires go to the bottom
red wires go to the top of the remote
Use conductive tape to attach the wires.
Check out my video tutorial above for full instructions.
If something is not working
First, check the tips above for trouble-shooting the normal remote. They help with the solar version, too!
If the solar cells are not working:
Lift the robot. If the wheels start rotating everything is fine but there is not enough power. Solar cells work best when held perpendicular to the sunbeams. Consider adding another solar cell for more power or look for a really sunny spot.
If the wheels do not rotate at all you need to check the wiring of the solar cells and make sure there is enough sun hitting the solar cells.
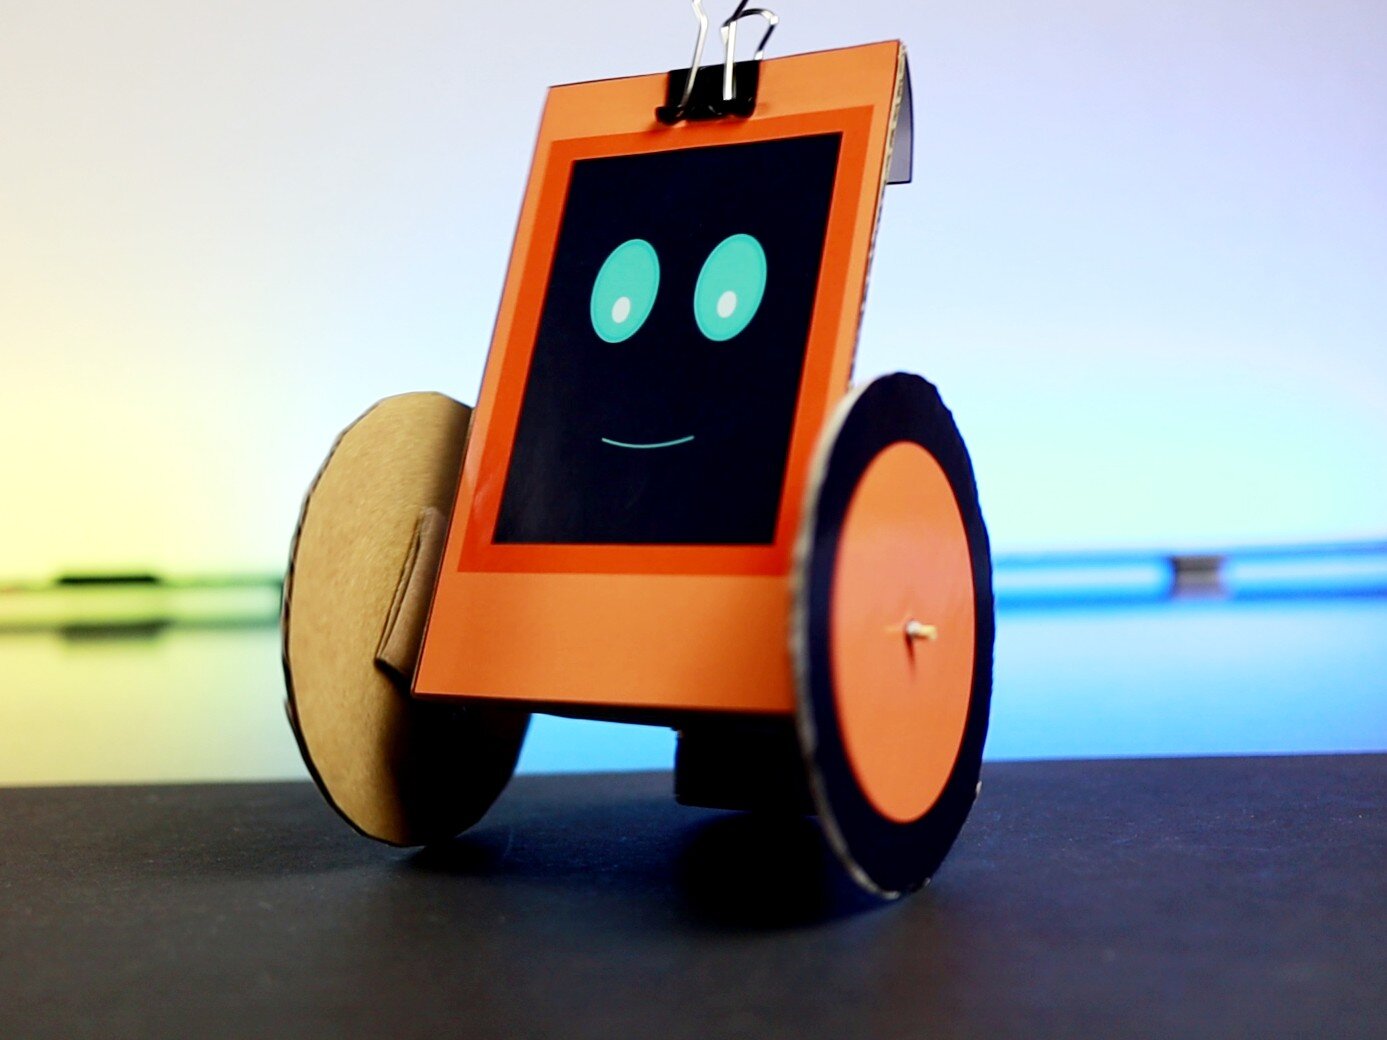
Upgrade 3: The Robot’s Body
Let kids design their own robot!
Materials
The printed template blank or colored
Scissors and glue
There is a colored template and a white template. Kids can color the white template upfront.
Note: Print the template on 160g-250g paper. The colored templates look great on glossy (photo) paper!

Score every edge
Score all dotted edges with the round edge of the binder clip and a ruler.

Cut out all pieces
Cut out all pieces.
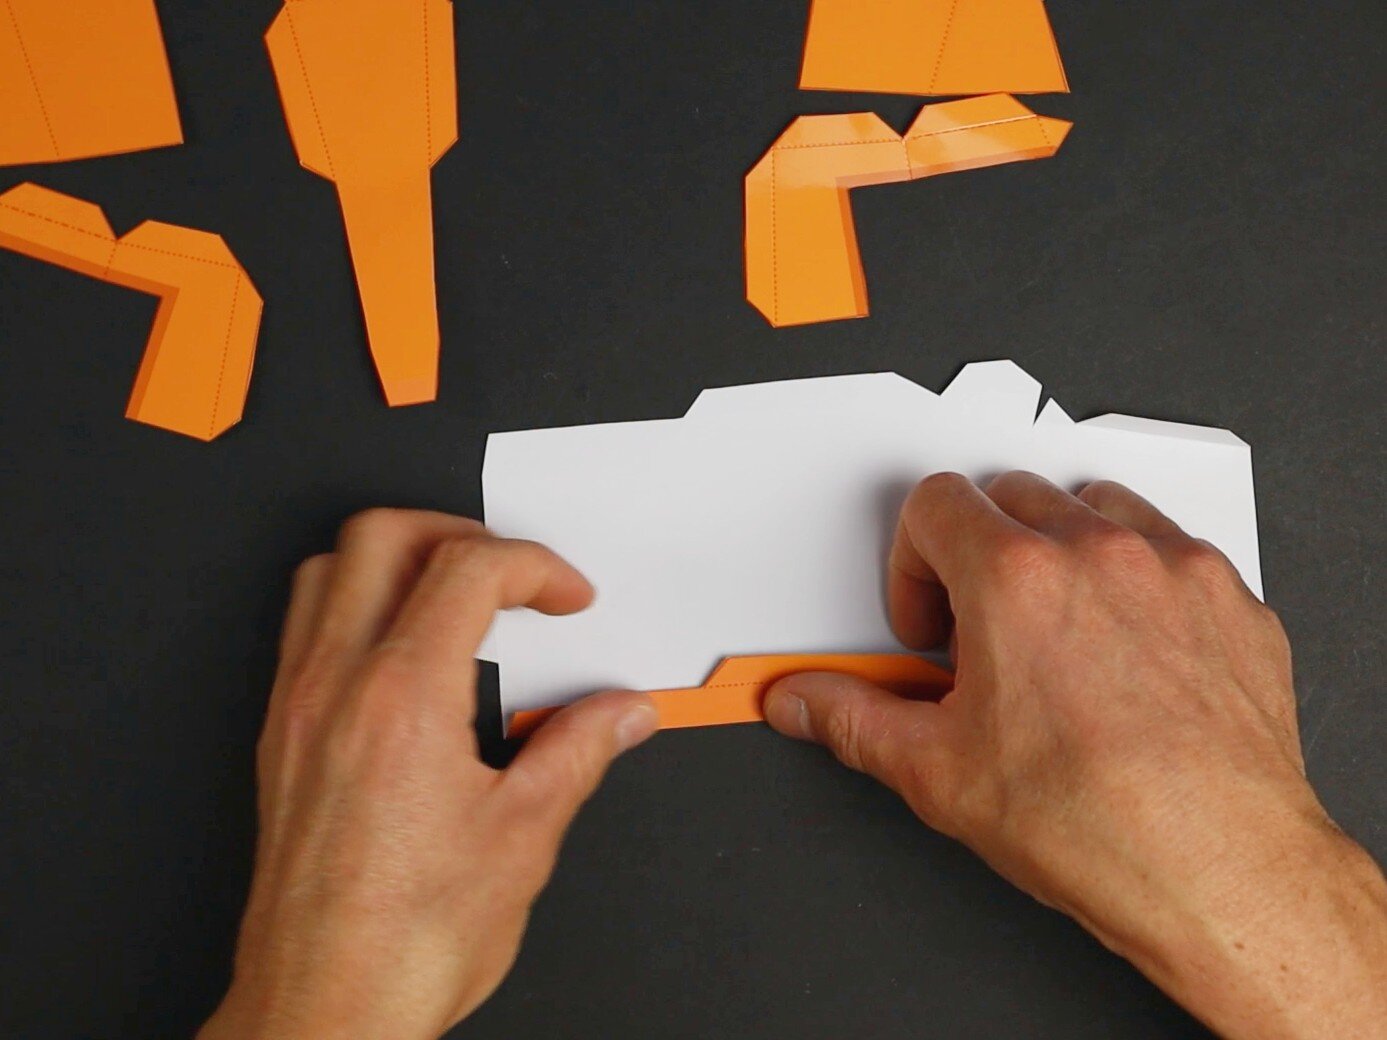
prefold all edges
Prefold all edges (two times). This helps a lot when glueing everything together.
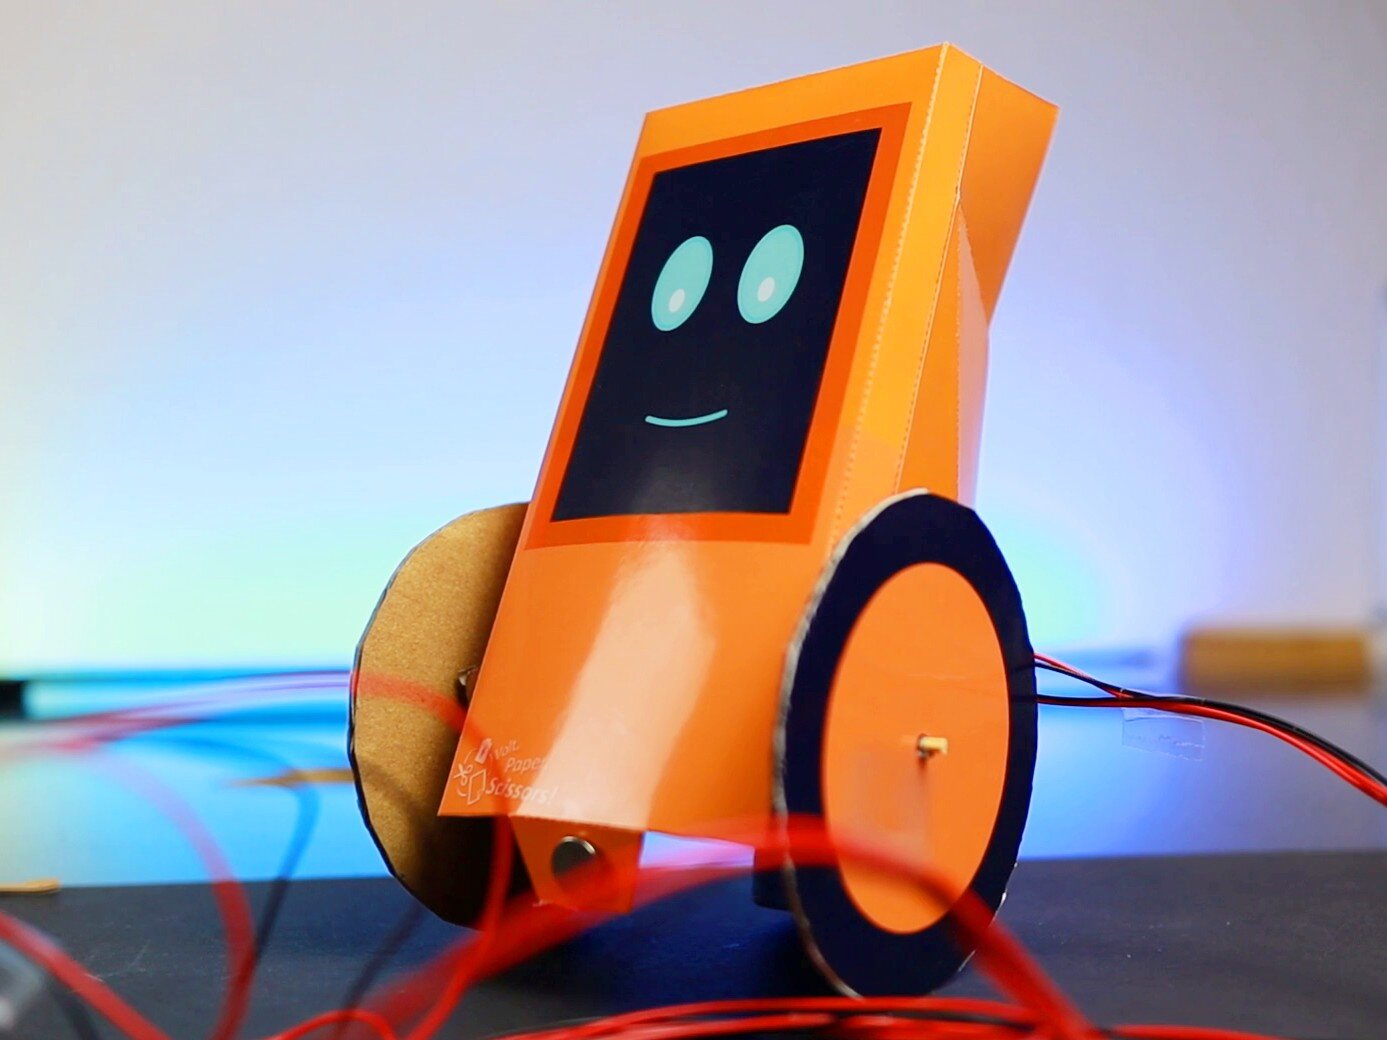
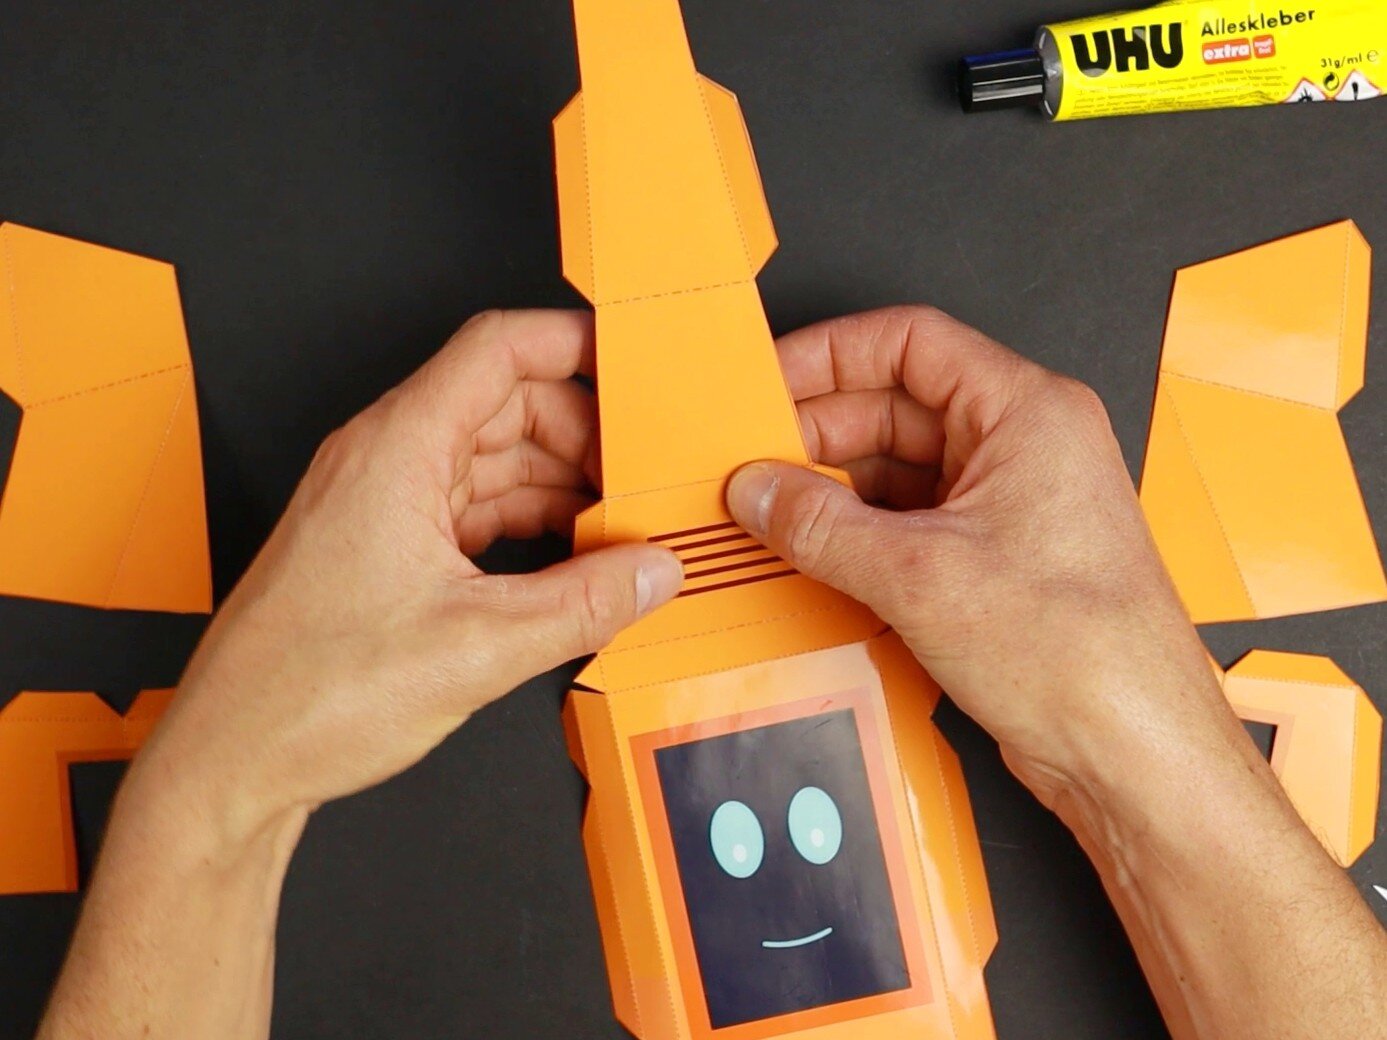
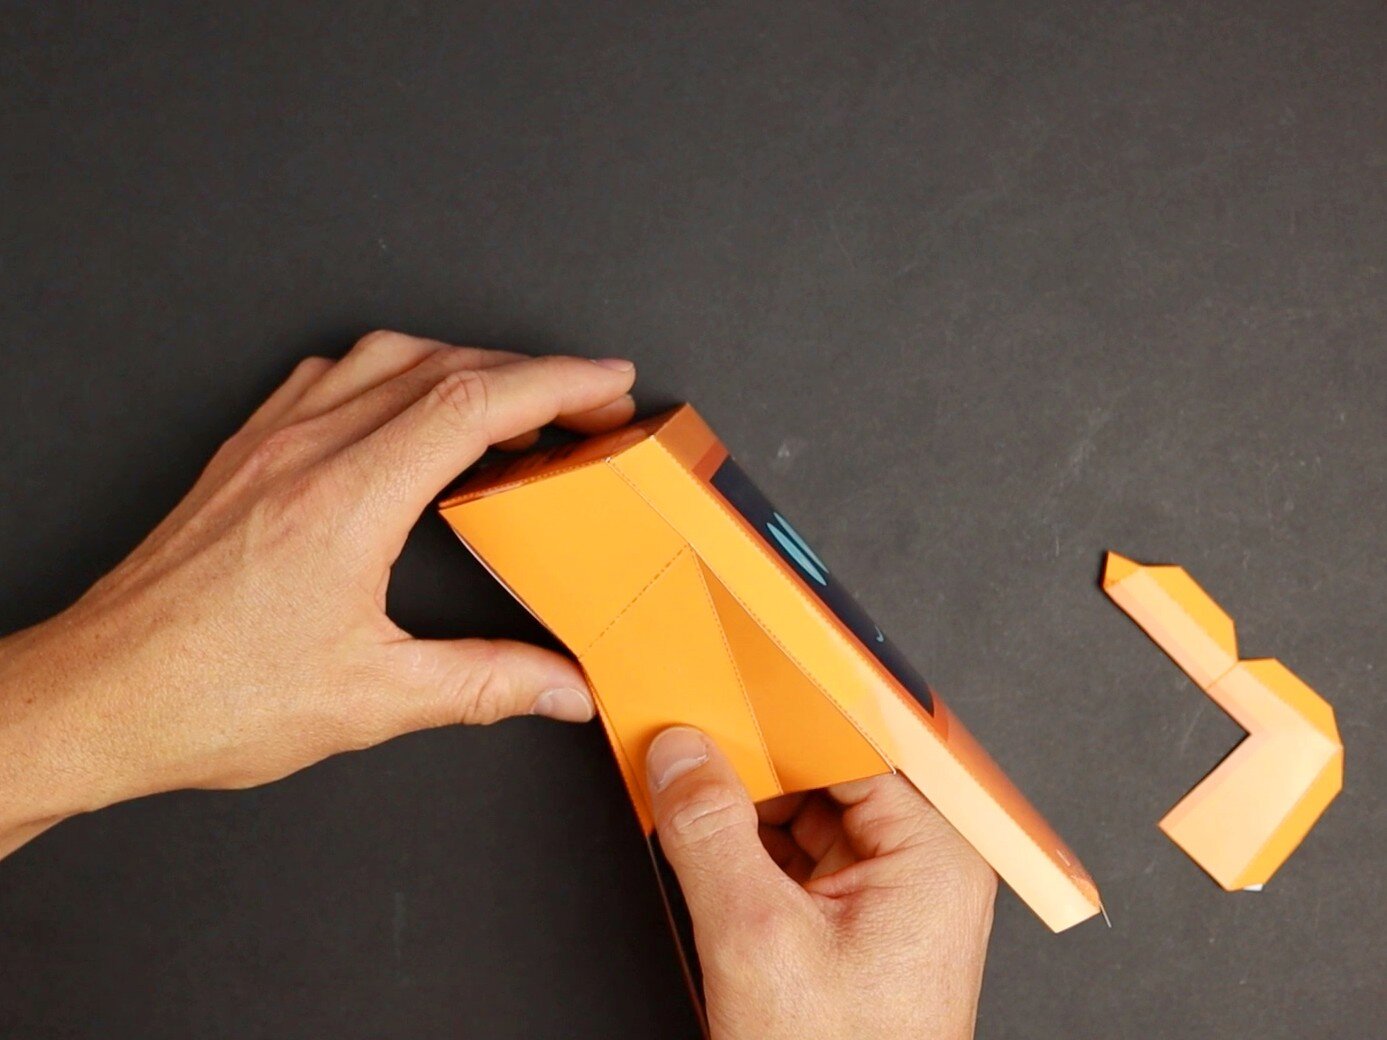
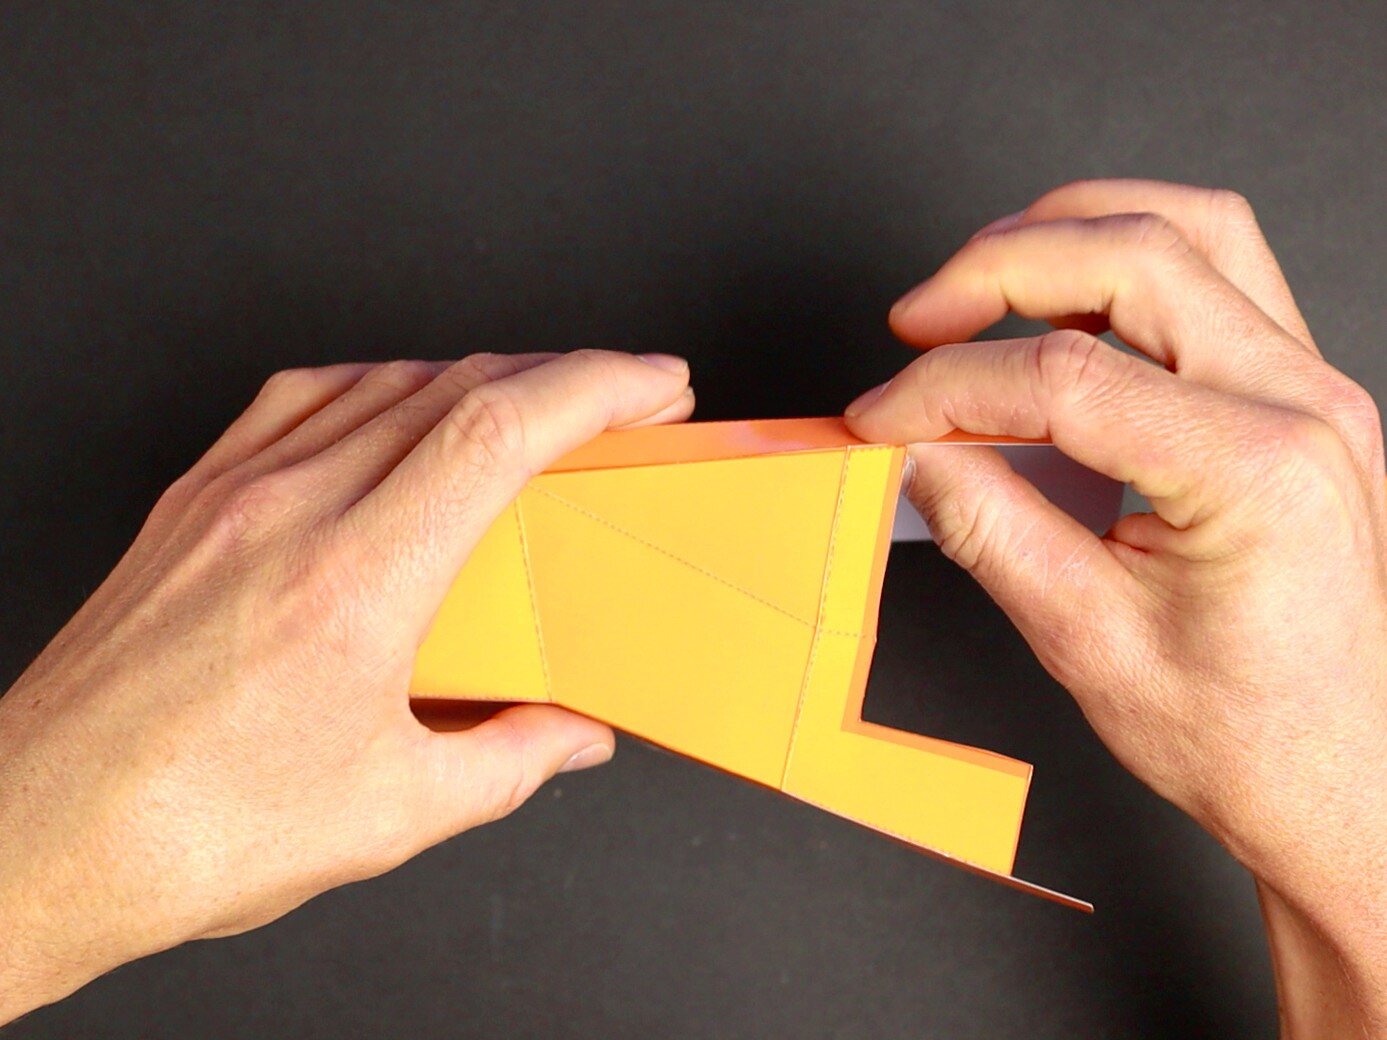

Glue everything together
Glue the body togehter in that order:
front to back
the two top sides
the two bottom sides
Check out my video tutorial above for full instructions.
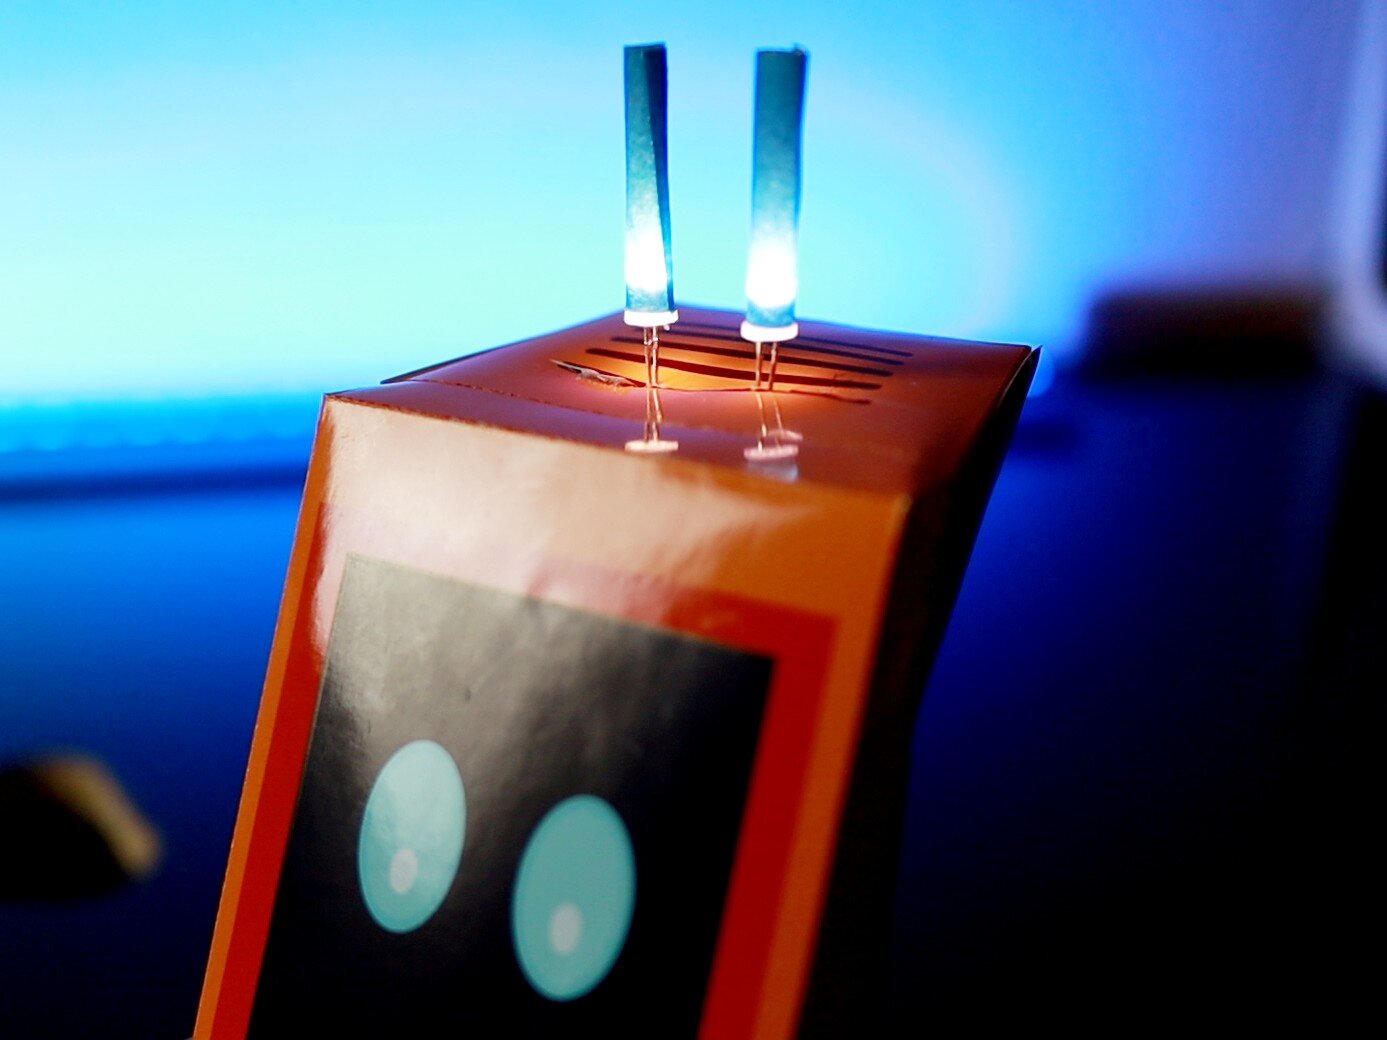
Upgrade 5: Light-Up Antennae
Kids can make their robot glow in the dark!
Materials
The printed template
Two LEDs (i use white LEDs)
An additional binder clip
An additional button cell (CR2032)

Cut, fold and Trace
Cut the template. Trace the circuit with conductive tape. Fold and glue the template together. Learn more about paper circuits here.

Optional: Paper Antennaes
Use oil to make colored paper transparent. Roll it up and glue it around the LED.

Attach LEDs
Attach the legs of the LEDs to the circuits with conductive tape. The long legs have to point to the plus pole!

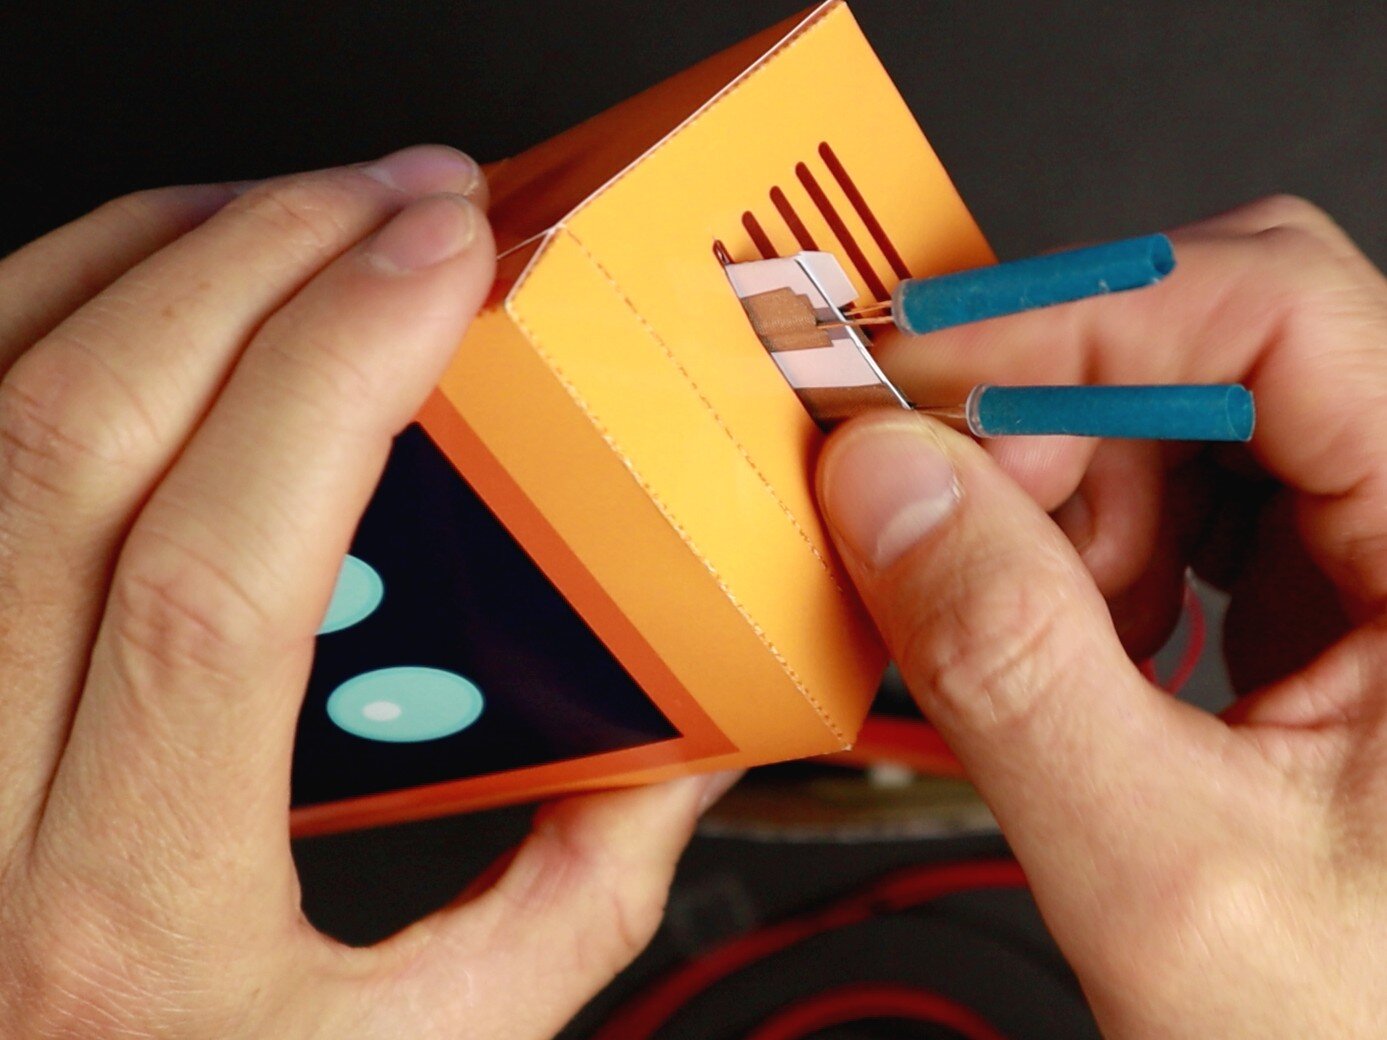

Attach it To the Body or Chassis
Make a cut at the top of the robot's body and push the LED holder through the cut. Attach a battery at the lower end.
Alternatively, you can attach the LED holder to the robot's chassis.
Check out my video tutorial above for full instructions.
If something is not working
If the LEDs do not light up:
Often it helps to detach and reattach the battery.
Turn around the LEDs (long leg has to point to the plus pole!)
Alternatively, you can turn around the battery
Check for gaps in the circuit tracks and for short circuits
Ultimate Upgrade: Smartphone Robot
Turn a smartphone into a robot!
Smartphone Robot
Once you have at least the basic robot working you can start making the programmable smartphone robot. It uses a smartphone as the robot's brain and MIT App Inventor to program the smartphone! Possibilities are endless!

This work is licensed under a Creative Commons Attribution-NonCommercial-ShareAlike 4.0 International License.

If you want to use my work commercially, write me an e-mail.
If you use or share my work, please attribute VoltPaperScissors.com as the creator of this work and provide a clickable link where possible.
Find more information about me, my project, and the license I use here.